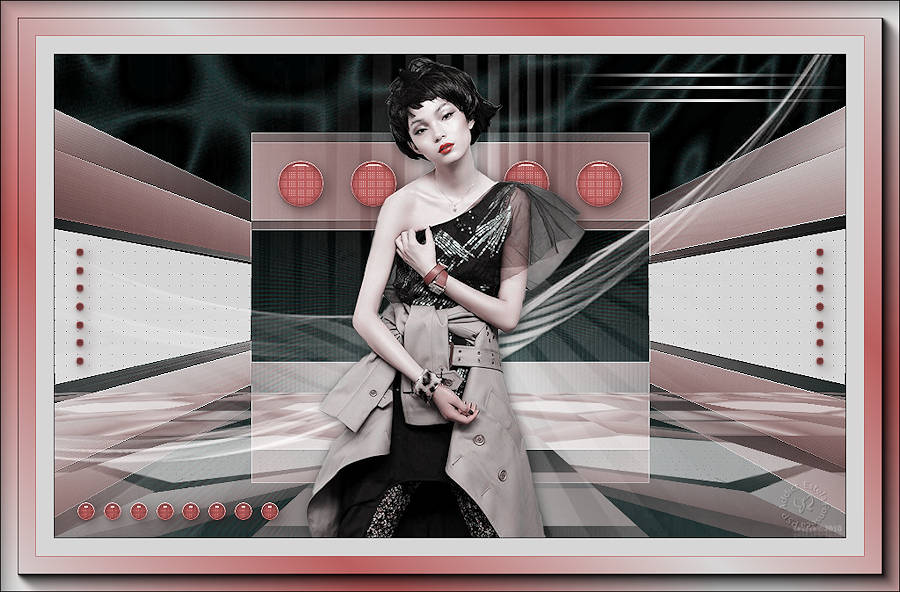
CLEENA
Tutorial de ©Alenza, original, AQUI.
Tutorial traduzido no PSP X8, mas pode ser feito com outras versões.
Material Necessário:
Tube de Mina
Masque
Plugins Utilizados:
Filter Factory Gallery S, itsa Edge thing
Filter Factory Gallery B, Button DeLuxe
Mura's Meister, Perspective Tiling
VM Texture, Four Centers
Penta.com, Dot and Cross
Alien Skin Eye Candy 5, Impact, Glass
AAA Frames, Foto Frame
Preparação:
Abra os tubes, duplique e feche os originais.
1) Abra a layer <<alenza_alpha_cleena>>
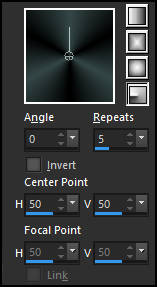
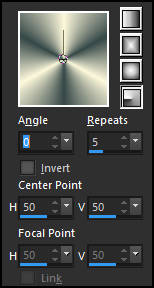
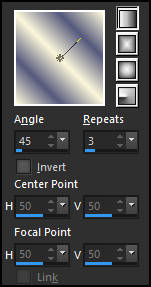
2) Coloque no Primeiro Plano a cor #354747 e no Segundo Plano a cor #0000003) Forme um Gradiente estilo <<Radial>>
Preencha a Layer com o Gradiente
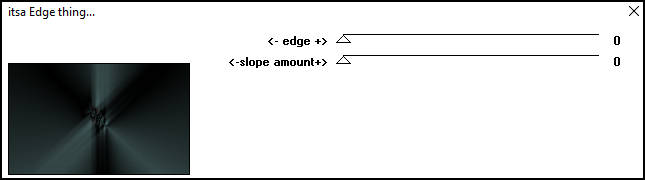
4) Effects / Plugin / Filter Factory Gallery S / itsa Edge thing
5) Repita o Plugin mais uma vez
6) Layers / New Raster Layer
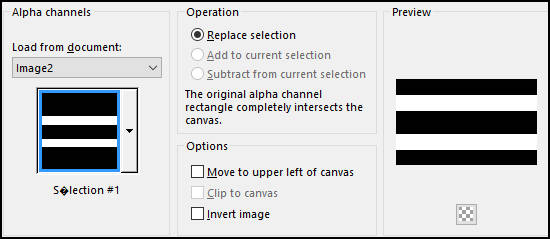
Selections / Load save selection / Load selection from alpha channel: Seleção #1
Mude a cor do Primeiro Plano para #fcf8db e do Segundo Plano para #354747
Forme um Gradiente estilo <<Radial>> Mesmas configurações de antes:
Preencha a seleção com esse gradiente
7) Selections / Select None
Effects / Image Effects / Seamless Tiling
8) Effects / Plugin / Filter Factory Gallery B / Button DeLuxe.
9) Layers / New Raster Layer
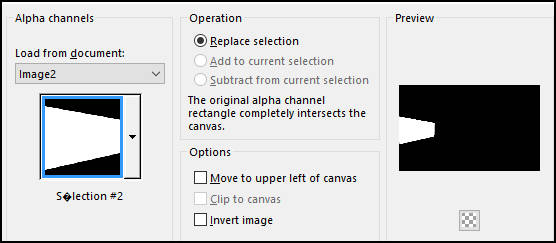
Selections / Load save selection / Load selection from alpha channel: Seleção #2
Preencha a seleção com a cor do Primeiro Plano #fcf8db
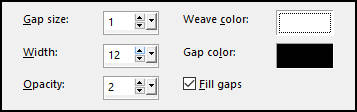
Effects / Texture Effects / Weave
10) Selections / Select None
Layers / Duplicate
Image / Mirror / Mirror Horizontal (image-Mirror, para versões anteriores do PSP)
11) Layers / Merge / Merge Down (2 vezes)
Palete de layers agora está assim:
12) Na Layer <<Raster 2>>
Opacidade / 63
Layers / Duplicate
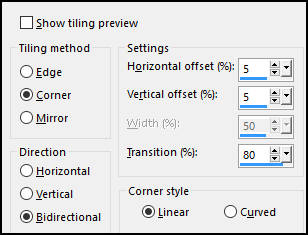
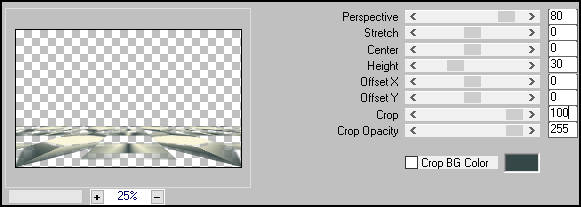
Effects / Plugin / Mura's Meister / Perspective Tiling
13) Ative a Segunda Layer à partir da Layer do topo << Raster 2>>
Effects / Edge Effects / Enhance
14) Ative a Layer do fundo <<Raster 1>>
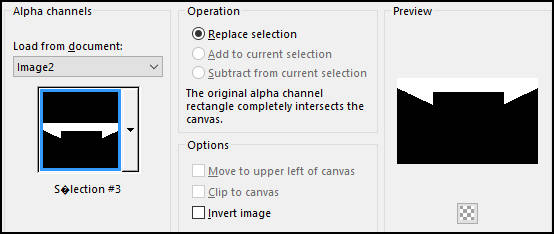
Selections / Load save selection / Load selection from alpha channel: Seleção #3
Layers / Promote Selection to Layer
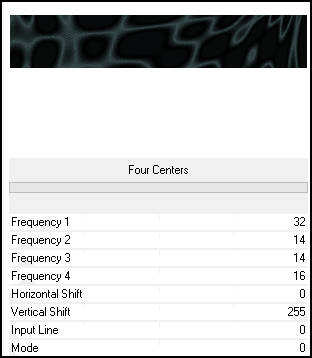
Effects / Plugin / VM Texture / Four Centers.
15) Selections / Select None16) Ative Novamente a Layer do fundo << Raster 1>>
Selections / Load save selection / Load selection from alpha channel: Seleção #4
Selections / Promote Selection to Layer
Effects / Texture Effects / Blinds
Selections / Select None
Ative a Layer do topo
Layers / New Raster Layer
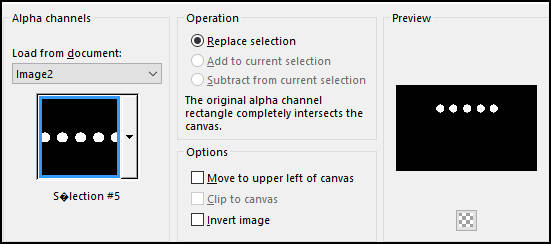
Selections / Load save selection / Load selection from alpha channel: Seleção #5
Preencha a seleção com a cor do Primeiro Plano #fcf8db
Selections / Modify / Contract 1 pixel
Preencha a Seleção com a cor #55597c
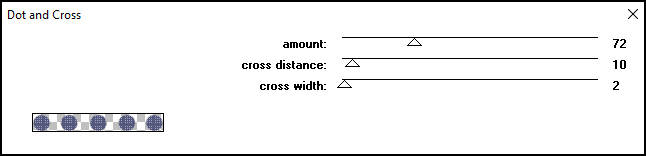
17) Effects / Plugin / Penta.com / Dot and Cross.
18) Effects / Plugin / Alien Skin Eye Candy 5 / Impact / Glass / Clear.
19) Selections / Select None
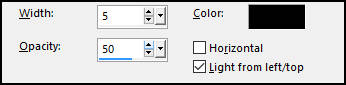
Effects / 3D Effects / Drop Shadow: 5 / 5 / 50 / 20,00 / #000000
20) Layers / New Raster Layer
Preencha com a cor do Primeiro Plano #fcf8db
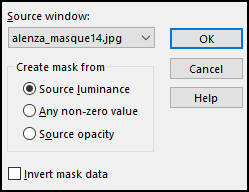
Abra a Mask << alenza_masque14>> Minimize
Layers / New Mask layer / From Image:
21) Layers / Merge / Merge Group
Blend Mode / Hard Light
Layers / Arrange / Move Down
22) Ative a Layer do topo
Layers / New Raster Layer
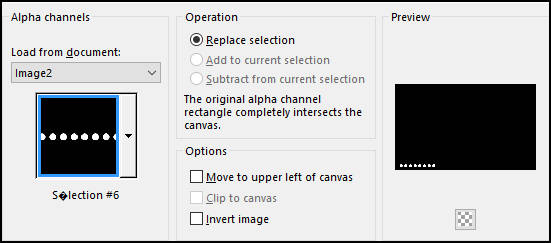
Selections / Load save selection / Load selection from alpha channel: Seleção #6
Preencha com a cor do Primeiro Plano #fcf8db
Selections / Modify / Contract 1 pixel
Preencha a seleção com a cor #55597c.
23) Effects / Plugin / Penta.com / Dot and Cross (como antes)
24) Effects / Plugin / Alien Skin Eye Candy 5 / Impact / Glass / Clear
Selections / Select None
Effects / 3D Effects / Drop Shadow: 5 / 5 / 50 / 20,00 / #000000
25) Layers / New Raster Layer
Selections / Load save selection / Load selection from alpha channel: Seleção #7
Preencha com a cor do Primeiro Plano #fcf8db
Selections / Select None
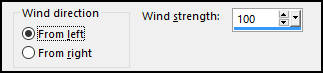
Effects / Distortion Effects / Wind
26) Layers / New Raster Layer
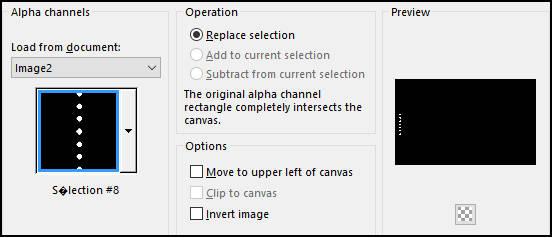
Selections / Load save selection / Load selection from alpha channel: Seleção #8
Preencha a seleção com a cor #55597c
Selections / Select None
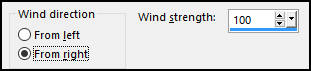
Effects / Plugin / Alien Skin Eye Candy 5 / Impact / Glass / Clear
27) Layers / DuplicateImage / Mirror / Mirror Horizontal (image-Mirror, para versões anteriores)
Layers / Merge / Merge Down
Effects / 3D Effects / Drop Shadow: 5 / 5 / 50 / 20,00 / #000000
28) Ative a Segunda Layer à partir da Layer do fundo <<Promote Selection 1>>
Blend Mode / Exclusion.
29) Ative a Layer do Topo
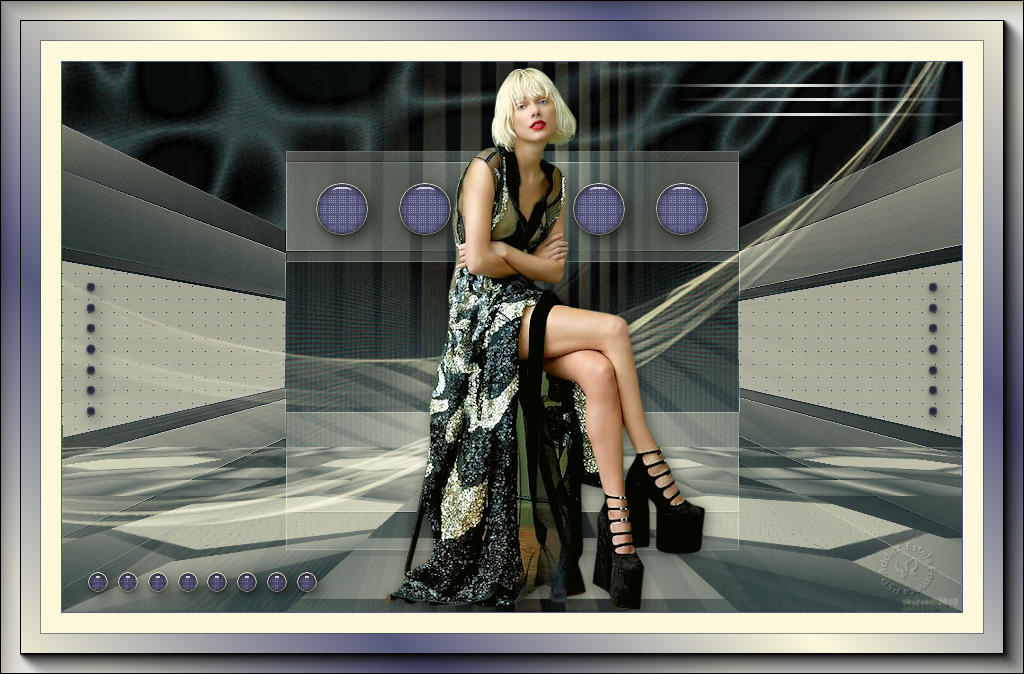
Abra o tube <<Mina@.4110.Woman.06>>
Image / Resize / 90% (resize all layers marcado)
Copie e Cole como nova layer
Effects / 3D Effects / Drop Shadow: 2 / 2 / 50 / 20,00 / #000000
Posicione
30) Image / Add Borders / Symmetric Marcado / 1 pixel cor #55597cImage / Add Borders / Symmetric Marcado / 20 pixels cor #fcf8db
Image / Add Borders / Symmetric Marcado / 1 pixel cor #354747
Image / Add Borders / Symmetric Marcado / 40 pixels cor #55597c
31) Ative a Varinha Mágica e selecione a borda de 40 pixels
Preencha com o Gradiente estilo <<Linear>> Formado das cores
(Primeiro Plano cor #fcf8db / Segundo Plano cor #55597c)
32) Selections / Select None
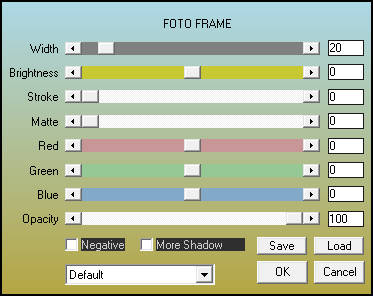
Effects / Plugin / AAA Frames / Foto Frame.
33) Adicione a sua assinaturaRedimensione se desejar
Salve como jpg.
Versão com tube de Mery Design:
©Tutorial Traduzido por Estela Fonseca 14/02/2017.
Obrigada Alenza por me permitir traduzir seu trabalho.