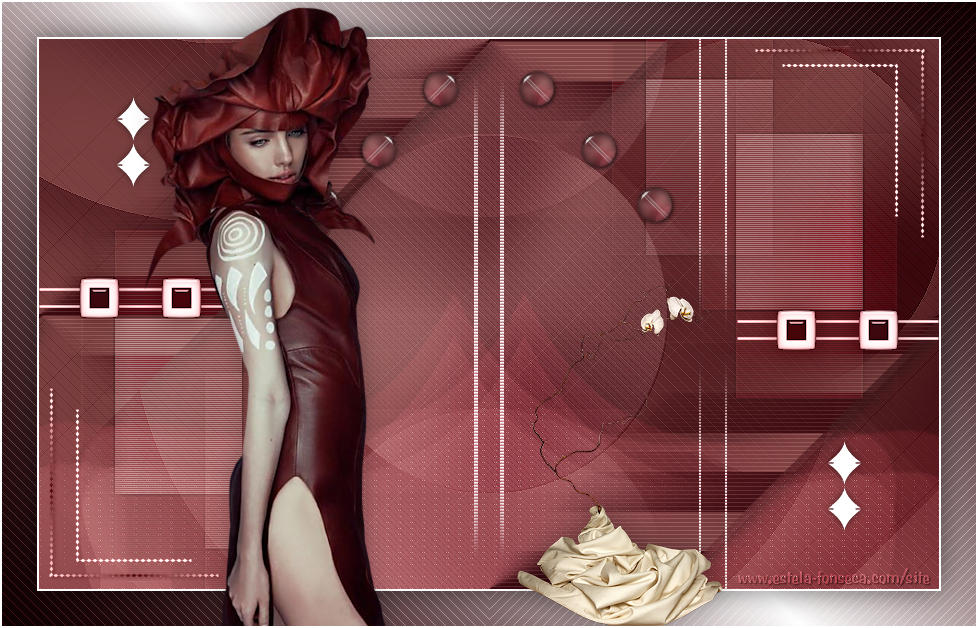
ANY
Tutorial de ©Creative Graphic Original Aqui
Traduzido no PSP X8
Materiais Necessários:
Tube de Syl
Tube do Vaso de Maryse
Plugins Utilizados:
Unlimited/Bkg Kaléidoscope/Radial Mirror
Simple /Blintz
Carolaine And Sensibility/CS-Lineair-H & cs_texture
Mura’s Meister Pole Transform 2.1
AP 01 Innovation /Lines Silverlining
Toadies /What Are You
Vanderlee/unplugged X/Verticale Tile
L & K/Frederiek & Paris
It@lian Editors effect/Effeto Fantasma
Eyes Candy Impact 5/Glass
Preparação:Abra os tubes no PSP , duplique e feche os originais.
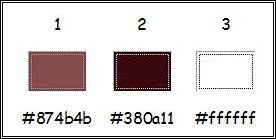
Tabela de Cores:
Se você usar cores e tubes diferentes, os modos de misturas (blend mode) e opacidades das layers podem variar.
Primeiro Plano cor #874b4b
Segundo Plano Cor #380a11
01- Abra <<alpha_any>>Window / Duplicate (Feche o original)
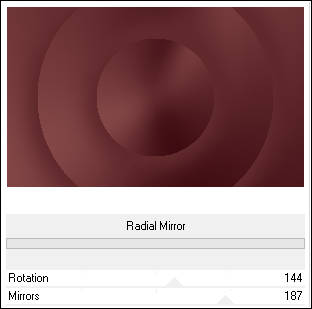
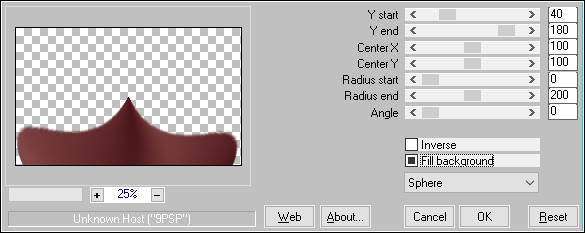
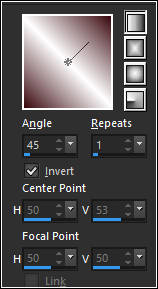
02- Gradiente estilo <<Radial>>
Preencha a Layer com o Gradiente
Adjust / Blur / Gaussian Blur / Radius 30
Effects / Plugin / <<I.C.NET Software> Filters Unlimited 2 / Bkg Kaléidoscope /Radial Mirror
Adjust / Sharpness / Sharpen
Effects / Plugin / Simple / Blintz
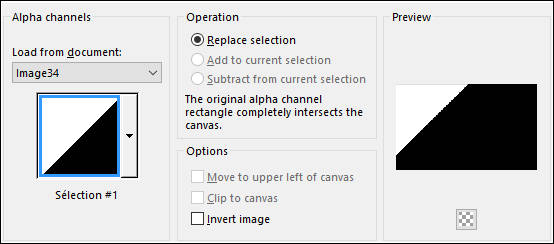
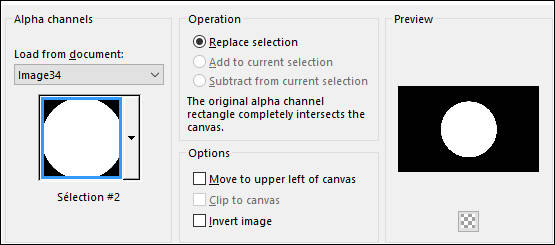
02- Selections / Load Save Selection / Load Selection From Alpha Channel: Selection #1
Selections / Promote Selection to Layer
Selections / Select None
Effects / Plugin / Carolaine And Sensibility / CS-Lineair-H
Effects / 3D Effects / Drop Shadow: 0/0/100/40,00 / #000000
Effects / Plugin / Coralaine And Sensibility / Cs_texture
Effects / Image Effects / Seamless Tiling
03- Ative a Layer do Fundo (Raster 1 )
Selections / Load Save Selection / Load Selection From Alpha Channel: Selection #2
Selections / Promote Selection to Layer
Selections / Select None
Effects / Plugin / Mura’s Meister / Pole Transform 2.1
Blend Mode / Screen
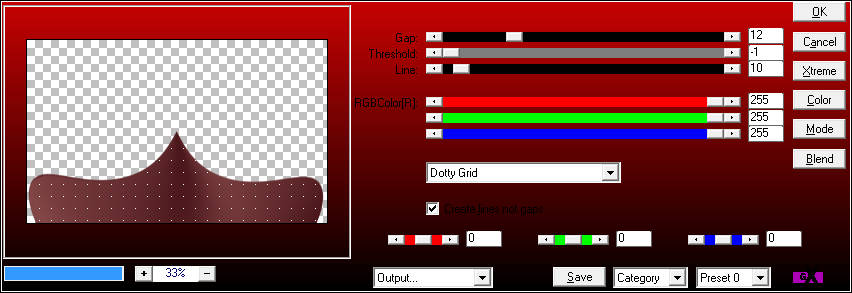
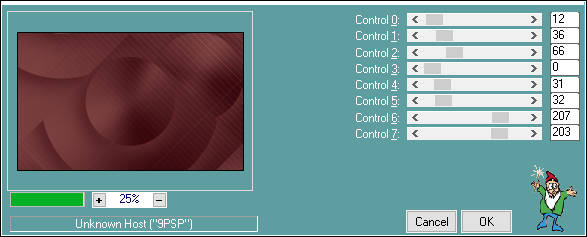
Effects / Plugin / AP 01 Innovation / Lines Silverlining
Effects / Plugin / Toadies / What Are You (Default)
Adjust / Sharpness / Sharpen
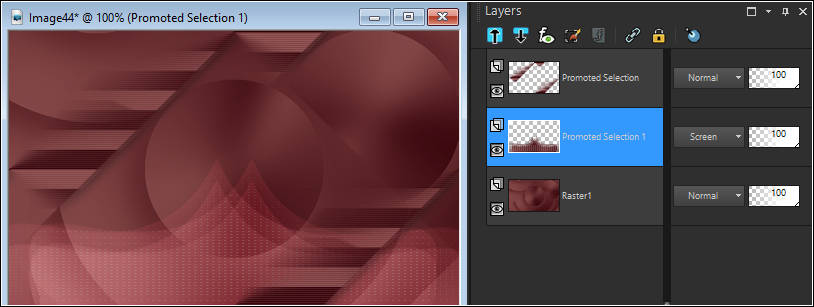
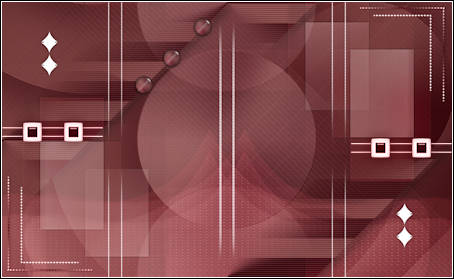
04- Resultado:
05- Ative a Layer do Fundo ( Raster 1)
Selections / Load Save Selection / Load Selection From Alpha Channel: Selection #2
Selections / Promote Selection to Layer
Selections / Select None
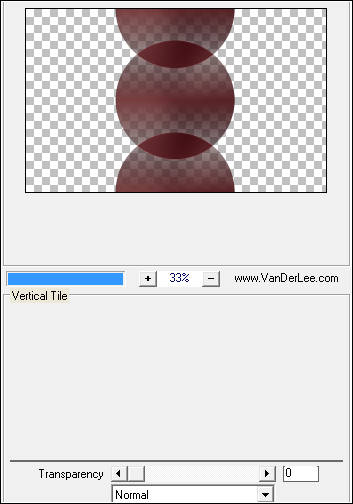
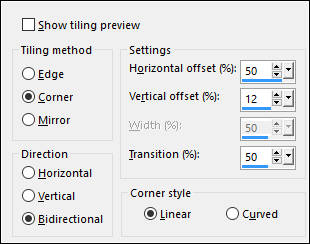
Effects / Plugin / VanDerLee / UnPlugged X / Vertical Tile
Blend Mode / Screen
Opacidade / 30 (até 50)
Adjust / Sharpness / Sharpen
Effects / Plugin / L & K / Frederiek
06- Ative a Layer do topo
Layers / New Raster Layer
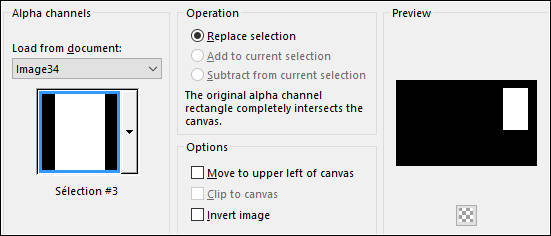
Selections / Load Save Selection / Load Selection From Alpha Channel: Selection #3
Primeiro Plano cor #ffffff
Opacidade do Baldinho de Pintura 30
Preencha a seleção
Selections / Select None
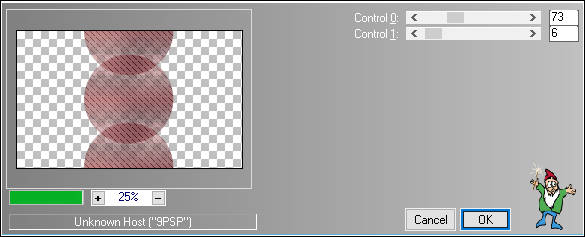
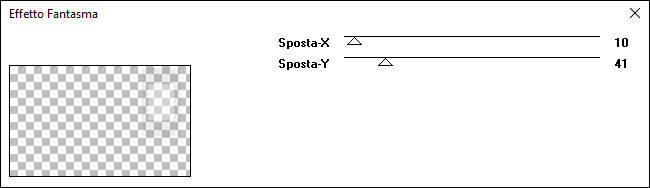
Effects / Plugins / It@lian Editors effect / Effeto Fantasma
Adjust / Sharpness / Sharpen More
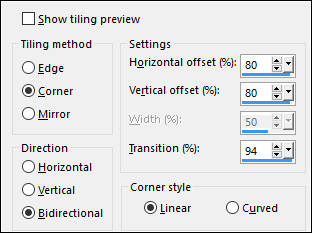
Effects / Image Effects / Seamless Tiling
Blend Mode / Luminance ou Luminance (Legacy)
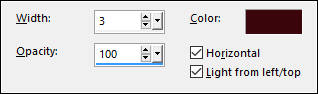
Effects / Texture Effects / Blinds / Cor do Segundo Plano
Effects / 3D Effects / Drop Shadow: 2 / -2 / 30 / 10,00 / Cor #000000
Layers / Duplicate
Image / Mirror / Mirror Horizontal
Image / Mirror / Mirror Vertical
Layers / Merge / Merge Down
07- Layers / New Raster Layer
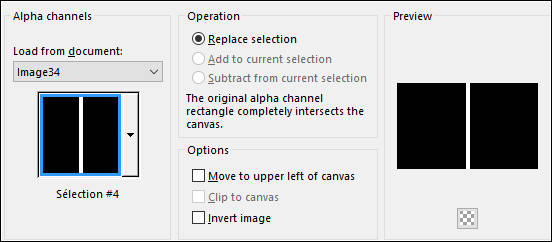
Selections / Load Save Selection / Load Selection From Alpha Channel: Selection #4
Mude a Opacidade do Baldinho de Pintura para 100%
Preencha com a cor do Primeiro Plano (#ffffff)Selections / Modify / Contract 2 pixels
Edit / Cut ou Delete no Teclado
Selections / Select None
Effects / Image Effects / Seamless Tiling
Layers / Duplicate
Image / Mirror / Mirror Horizontal
Layers / Merge / Merge Down
Blend Mode / Soft Light
Layers / Duplicate
Effects / Texture Effects / Blinds
Adjust / Sharpness / Sharpen
Blend Mode / Screen
08- Resultado:
09- Layers / New Raster Layer
Selections / Load Save Selection / Load Selection From Alpha Channel: Selection #5
Preencha a Seleção com a cor #ffffff
Selections / Select None
Effects / 3D Effects / Drop Shadow: 0/0/50/10,00 / #000000
Layers / Duplicate
Image / Mirror / Mirror Horizontal
Image / Mirror / Mirror Vertical
Layers / Merge / Merge Down
10- Ative o tube <<déco_1 Cre@line>>
Copie e Cole como Nova LayerBlend Mode / Luminance (Legacy)
11- Ative a Layer do Fundo (Raster 1)
Effects / Plugin / L & K /Paris
Adjust / Sharpness / Sharpen
Layers / Merge / Merge Visible
12- Ative o tube <<déco_2_cre@line>>
Copie e Cole Como Nova LayerNão Mova!
Blend Mode / Luminance (Legacy)
13- Ative a Layer do Fundo << Merged>>
Selections / Load Save Selection / Load Selection From Alpha Channel: Selection #2
Selections / Promote Selection to Layer
Selections / Select None
Image / Resize / 10%... Resize All layers ... Desmarcado
Effects / Plugin / Alien Skin Eye Candy 5 / Impact / Glass / Clear
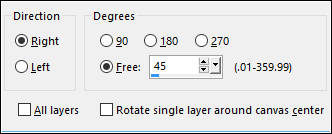
Image / Free Rotate:
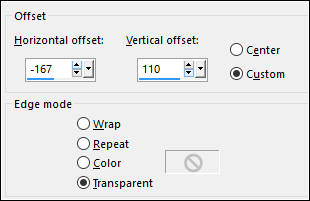
Effects / Image Effects / Offset
Layers / Duplicate ( 2 Vezes)
Posicione
Layers / Merge / Merge Down (2 Vezes)
Layers / Duplicate
Image / Mirror / Mirror Horizontal
Ou Image / Mirror / Mirror Vertical ( conforme seu gosto)
14- Image / Add Borders / Symmetric Marcado / 2 pixels cor #ffffff
Image / Add Borders / Symmetric Marcado / 35 pixels cor do Segundo Plano
Ative a Varinha Mágica ( Tolerance e Feather 0) Selecione a Borda de 35 pixels
Preencha com o Gradiente estilo <<Linear>>
Primeiro Plano cor #ffffff/ Segundo Plano cor #3a090f
Selections / Promote Selection to Layer
Selections / Select None
Effects / Plugin / AP 01 Innovation /Lines- Silverlining
Blend Mode / Multiply
Selections / Select All
Selections / Modify / Contract 35 pixels
Effects / 3D Effects / Drop Shadow: 0/0/50/40,00 / #000000
Selections / Select None
Layers / Merge / Merge Down
15- Ative o tube <<SVB/19 Beauty>> Copie e Cole como nova layer
Posicione
Effects / 3D Effects / Drop Shadow: 0/0/30/25,00 / #000000
16- Ative o tube <<MR Orchidées Still Life>>
Copie e Cole Como Nova Layer
Image / Resize / 50%... Resize All Layes ... Desmarcado
Posicione à Direita
Effects / 3D Effects / Drop Shadow: 0/0/30/25,00 / #000000
Adjust / Sharpness / Sharpen
Image / Add Borders / Symmetric Marcado / 2 pixels cor #ffffff
17- Layers / New Raster Layer
Coloque a sua assinatura
Layers / Merge / Merge All (Flatten)
Salve como JPG
Versão com tubes de Maryse:
©Tutorial Traduzido por Estela Fonseca 02/07/2017.
Obrigada Linnette por me permitir traduzir seu trabalho.