TUTORIAL 206
Tutorial de Mieke , original, Aqui.

Tutorial traduzido no PSP X8 mas pode ser feito em versões anteriores do PSP.
Materiais Necessários:
Tube de Luz Cristina, seu site AQUI
Plugins Utilizados:Mehdi / Wavy Lab1.1
Alien Skin Eye Candy 5 / Impact/ Backlight
MuRa's Meister / Perspective-Tiling
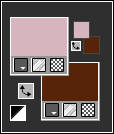
Primeiro Plano cor # d7b5bf / Segundo Plano cor # 58250c
01- Abra uma Nova imagem transparente de 850/500 pixels
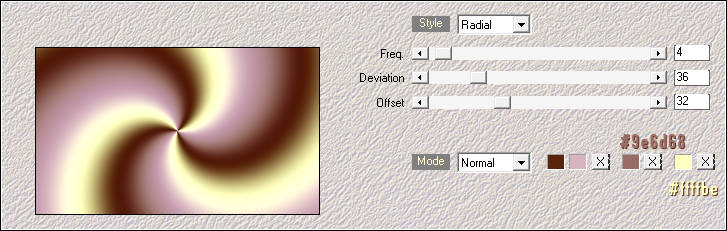
02- Effects / Plugin / Mehdi / Wavy Lab1.1
03- Layers / New raster layer04- Selections / Select All
05- Abra a imagem <<trippy____by_charly_v.jpg>>
06- Copie / Cole na Seleção
07- Selections / Select none
08- Blend Mode / Soft Light
Opacidade / 50
09- Layers / Merge / Merge down
10- Layers / Duplicate
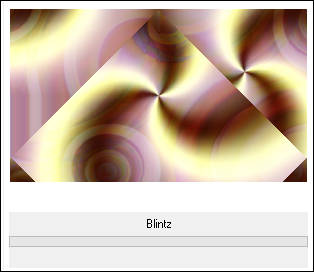
11- Effects / Plugin / <I C Net Software> Filters Unlimited 2.0>/ Simple / Blintz
12- Effects / Texture Effects / Blinds
13- Ative a Layer do Fundo <<Raster 1>>
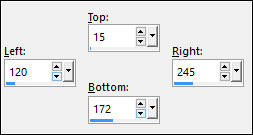
14- Selections / Load / Save selection / Load selection from disk : Mb-les-206-2017.PspSelection
15- Selections/ Promote Selection to Layer
16- Layers / Arrange/ Move Up
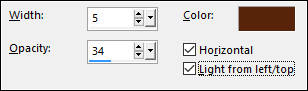
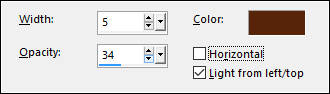
17- Effects / Texture Effects / Blinds:
18- Selections / Select none
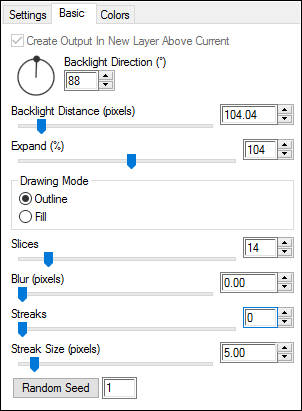
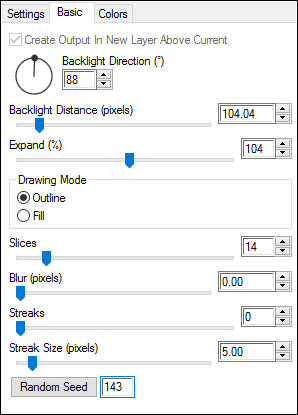
19- Effects / Plugin / Alien Skin Eye Candy 5 / Impact / Backlight
Guia Colors
20- Abra <<deco-1-2017-mb.png>>
21- Copie e Cole como nova layer
22- Objects / Align / Left.
23- Layers / Merge/ Merge down24- Layers / Duplicate
25- Image / Mirror / Mirror Horizontal (image-Mirror)
26- Abra o tube <<Deco-2-2017-mb.png>>
Copie e Cole como nova layer
27- Objects / Align / Bottom
28- Abra o tube <<deco-3-2017-mb.png>>
29- Copie e Cole como nova layer
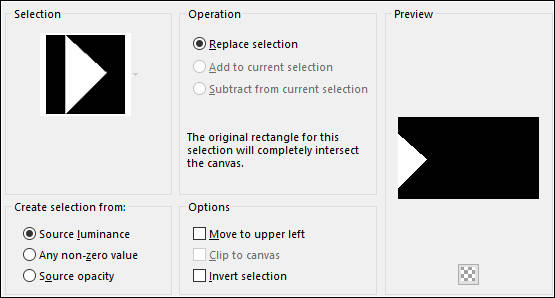
30- Ferramenta Selection Tool (S) / Rectangle / Custom Selection
31- Layers / New raster layer
Preencha com a cor escura (#491c11 )
32- Selections / Modify / Contract 1 pixel / Preencha com a cor escura
33- Selections / Modify / Contract 3 pixels / Preencha com a cor clara (#d3bac0
34- Selections / Modify / Contract 1 pixel / Preencha com a cor Clara
35- Selections / Modify / Contract 10 pixels / Preencha com a cor escura
36- Selections / Modify / Contract 1 pixels / Preencha com a cor clara
37- Abra << Trippy by_charly_v.jpg>>
38- Copie e Cole na seleção
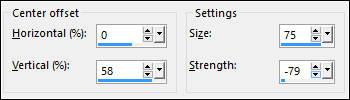
39- Opacidade / 60
40- Effects / 3D Effects / Drop Shadow: 0 / 0 / 50 / 80,00 / #000000
41- Selections / Select None
42- Effects / Plugin / Alien Skin Eye Candy 5 /Impact /Backlight
Layers / Duplicate
44- Image / Mirror
45- Layers / Merge / Merge Down
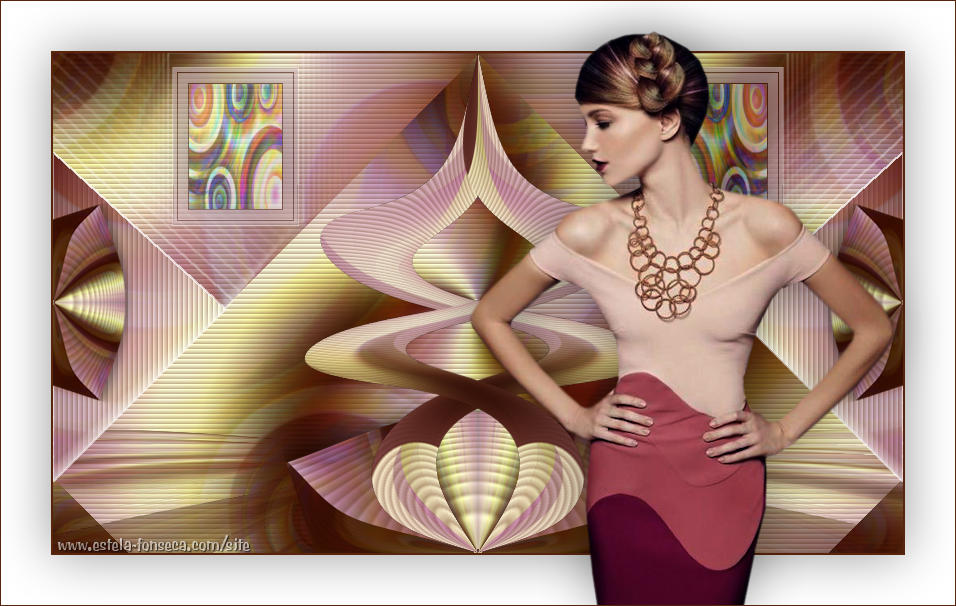
46- Ative a Layer <<Copy of Raster 1>>
47- Layers / Duplicate
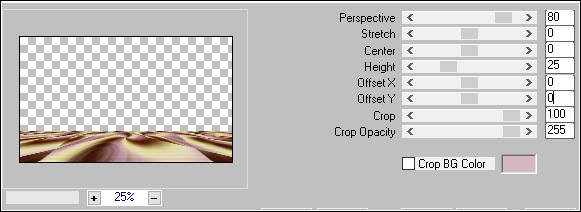
48- Effects / Plugin / Mura's Meister / Perspective Tiling
49- Effects / Distortion Effects / Warp
50- Opacidade / 50
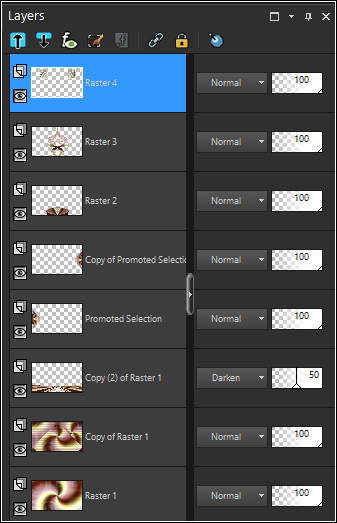
Suas Layers devem estar assim:
51- Image / Add Borders / Symmetric marcado / 2 Pixels / Cor escura52- Selections / Select All
53- Image / Add Borders / Symmetric marcado /50 pixels / Cor branca
54- . Effects / 3D Effects / Drop Shadow: 0 / 0 / 40 / 80,00 / #000000
55- Selections / Select None.
56- Abra o tube <<4532-luzcristina.png>> (Não esqueça de remover a marca d'água).
57- Copie e Cole como nova layer
Image / Resize / 90% (Resize all layers desmarcado)
58- Posicione sobre a borda inferior
59- Effects / 3D Effects / Drop Shadow: 0 / 0 / 40 / 80,00 / #000000
60- Image / Add Borders / Symmetric Marcado / 1 pixel cor #000000
61- Coloque a sua marca d'água
62- Redimensione se desejar
63- Exporte Como JPEG Optimizado
Versão com tube de Maryse:
©Tutorial traduzido por Estela Fonseca em 22/04/2017.
Não alterar nem repassar sem autorização.