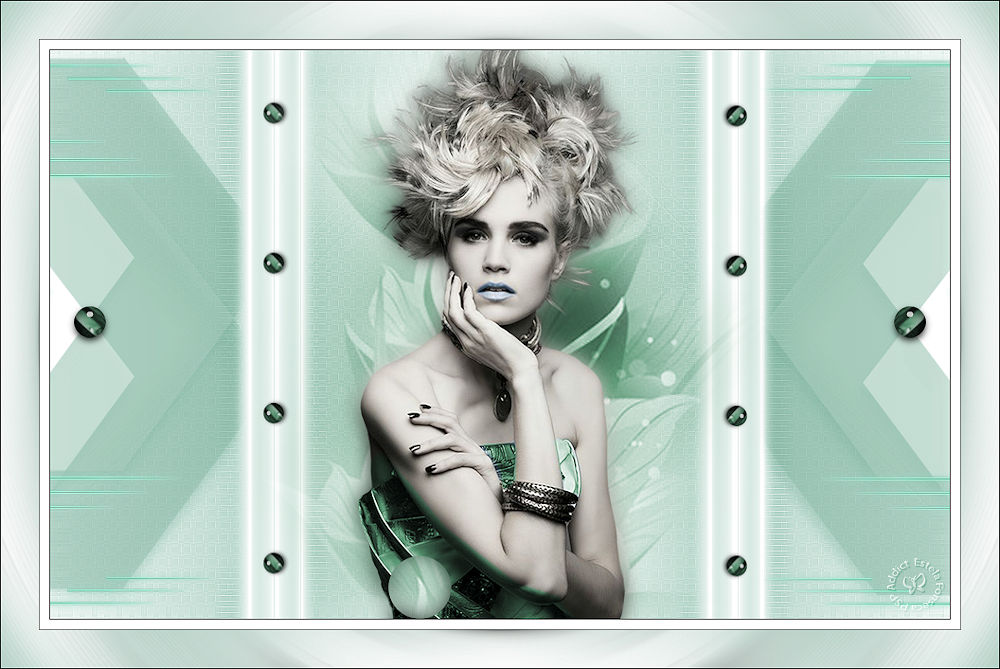
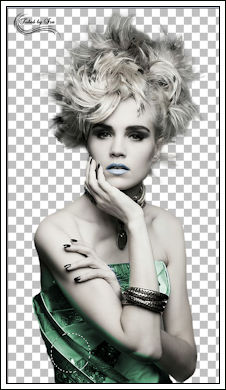
FLORAL
Tutorial de Regis , original, Aqui.
O tutorial foi realizado na versão Corel Paint sho Pro X8,
mas ele pode ser feito com outras versões.
Materiais Necessários:
Plugins Utilizados:
VanDerLee / Unplugged X / Tan DeformSimple / 4 Way Average
Toadies / What Are You?
Alien Skin Eye Candy 5 / Impact / Perspective Shadow
Carolaine and Sensibility / cs_textureItalian Editors Effect / Effeto Fantasma
Mura's Meister / Copies
Adjust / Variation
Preparação:Se você usar outras cores, mude a opacidade e o blend mode das layers.
Duplo clique no Preset do Plugin Alien Skin Eye Candy5 / Impact .
Duplo clique no Preset do Plugin Alien Skin Eye Candy5 / Glass .
01- Abra o arquivo <<Alpha - floral-alfa-regis>>Primeiro Plano Cor / #FFFFFF
Segundo Plano Cor / # 93c3b2
Preencha com a cor #FFFFFF
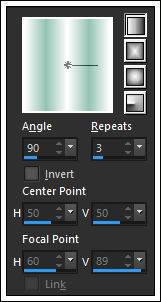
02- Forme um Gradiente estilo Linear Angle 90 / Repeats 3
Layers /New Raster Layer
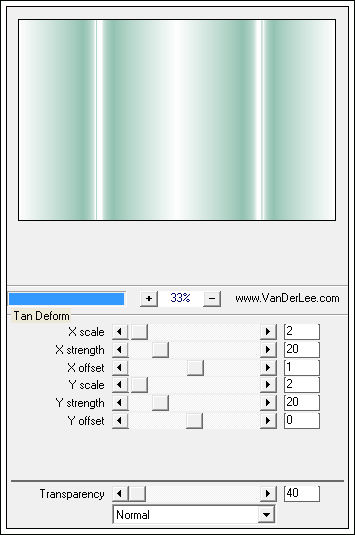
Preencha com o gradiente03- Effects / Plugin / VanDerLee / Unplugged X / Tan Deform
Effects / Plugin / VanDerLee / Unplugged X / Tan Deform
04- Layer / Duplicate
Ative a layer original (Raster 2)
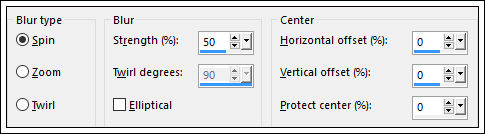
Adjust / Blur / Radial Blur
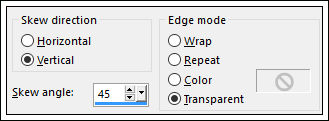
05- Effects / Geometric Effects / Skew
Layer / Duplicate
Layers / Merge / Merge Down
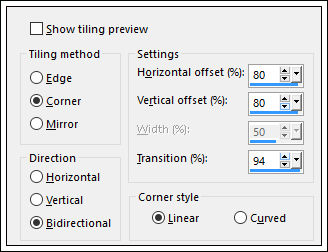
Effects / Plugin / Simple / 4 Way Average06- Effects / Plugin / Alien Skin Eye Candy 5 / Impact / Perspective Shadow / Preset - regis-floral-sombra
( Na Guia Basic mude a cor #93c3b2)
Repita mais uma vez.Effects / Texture Effects / Weave
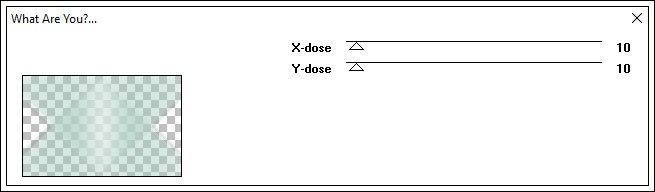
Effects / Plugin / Toadies / What Are You? 10/10
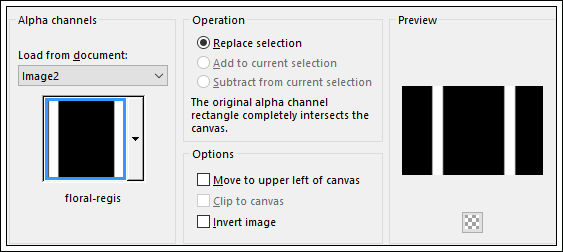
07- Selections / Load save selection / Load selection from Alpha Channel: floral-regis
Delete no teclado
08- Layers / New Raster Layer
Effects / 3D Effects / Drop Shadow: 0 / 20 / 20 / 0,00 / #93c3b2 (cor do segundo plano)
Selections / Select NoneEffects / Plugin / Carolaine e Sensibility / cs_texture
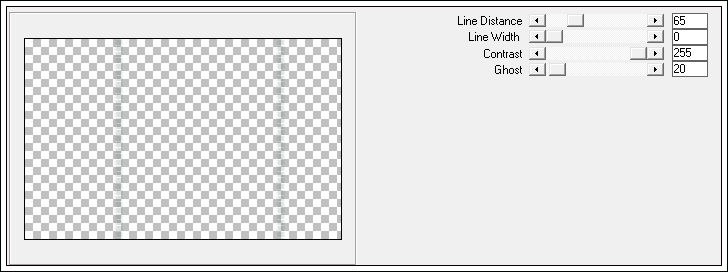
09- Effects / Image Effects / Seamless Tiling
Layers / Merge / Merge Down
Effects / Edge Effects / Enhance10- Selections / Load save selection / Load selection from Alpha Channel: floral-1-regis
Ative a Layer <<Raster 1>>Selections / Promote Selection to Layer
Layers / Arrange / Bring to top
Selections / Select None
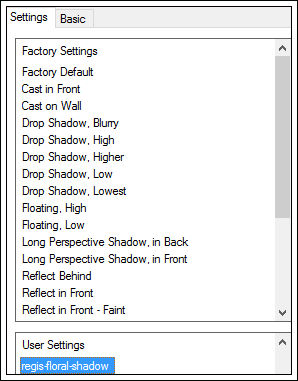
11- Effects / Plugin / Alien Skin Eye Candy 5 / Impact / Perspective Shadow
(mesmas configurações de antes)
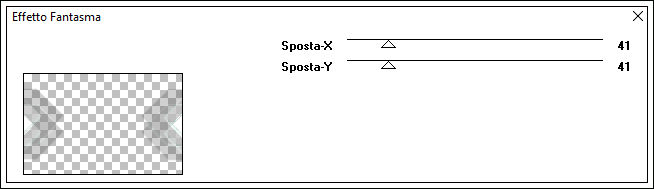
Effects / Plugin / Itali@n Editors Effect / Effetto Fantasma / Default
Effects / Plugin / Alien Skin Eye Candy 5 / Impact / Perspective Shadow / Mesmas Conigurações de antes
12- Selections / Load save selection / Load selection from Alpha Channel: floral-2-regis
Delete no teclado
Selections / Select None
Ative a Ferramenta Pick Tool (K) / Mode Scale
Arraste a Seleção para cima e para baixo até preencher toda a Layer
Layers / Duplicate
Blend Mode / Multiply13- Abra o tube <<deko1>> Copie e Cole como nova layer
Não Mova!
14- Layers / New Raster Layer
Selections / Load save selection / Load Selection From Alpha Channel: floral-3-regis
Abra o tube << FB0234>>
Ative a Ferramenta Selection Tool (S) / CircleFaça uma seleção como segue:
Copie e Cole na seleção
15- Effects / Plugin / alien Skin Eye Candy 5 /Impact / Glass / Preset << regis-floral-glass>>
Selections / Select NoneLayers / Duplicate
Image / Mirror / Mirror Horizontal (Image-Mirror)16- Layers / Duplicate
Image / Resize / 65% (Resize all layers desmarcado)Posicione como segue:
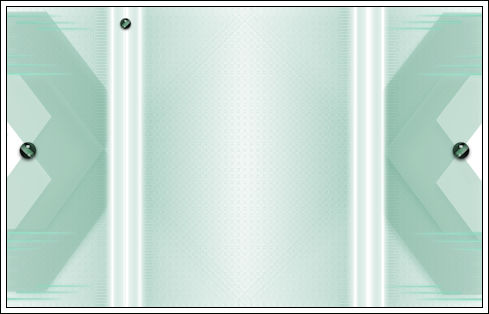
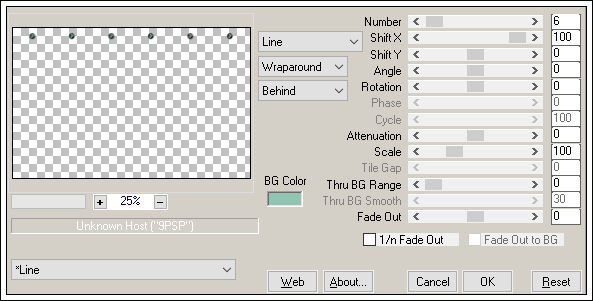
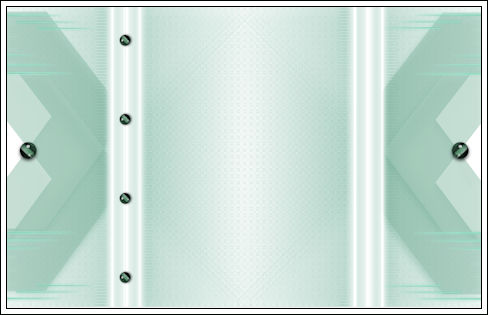
17- Effects / Plugin / Mura's Meister / Copies:
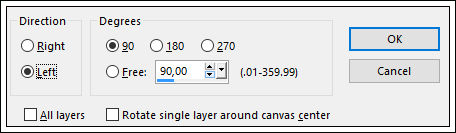
Image / Free Rotate / 90 / Left
Mova Para à esquerda e para baixo, como segue:
18- Layers / Duplicate
Image / Mirror / Mirror Horizonta (Image-Mirror)Arraste um pouco para à direita
19- Abra o tube << Yoka-aspergidas-Flor-070 715 >>
Copie e Cole como nova layer
20- Image / Resize / 85% (resize all layers desmarcado)
Não Mova!!!
Adjust / Hue and Saturation / Colorize: 104/63
Abra o tube << FB0234>> Copie e Cole como nova layer
Image / Resize / 85% (resize all layers desmarcado)
Layers / Duplicate
Ative a layer original (Raster 6)
Adjust / Blur / Gaussian Blur / 1021- Image / Add Borders / Symmetric Marcado / 1 pixel cor #000000
Image / Add Borders / Symmetric Marcado / 10 pixels Cor #FFFFFF
Image / Add Borders / Symmetric Marcado / 1 pixel cor # 000000
Image / Add Borders / Symmetric Marcado / 40 pixels Cor #FFFFFF
Image / Add Borders / Symmetric Marcado / 1 pixel Cor # 000000
Clique com a varinha mágica na borda de 40 pixelsAdjust / Blur / Radial Blur
22- Effects / Plugin / Adjust / Variations: clique em Original , em More Green e 2x em Darker
Selections / Select None
Image / Resize / 1000 pixels de largura
23- Não esqueça sua assinatura
Layers / Merge / Merge all
Salve como jpg.
©Tutorial traduzido por Estela Fonseca em 02/06/2016.
Não alterar nem repassar sem autorização.