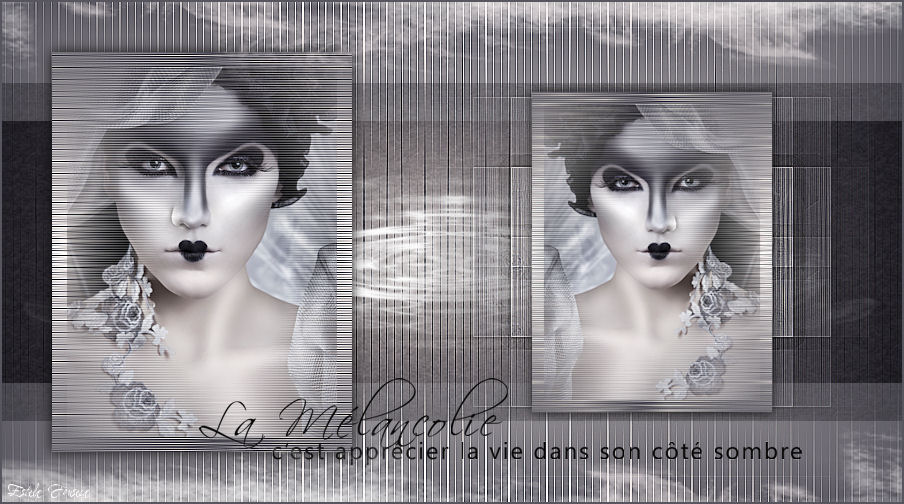
LOUISE
Tutorial de ©Rose Orange , original Aqui.
Realizado no PSP 12
Materiais Necessários:
Tubes:
Misted Mulher : Aclis
Elementos Scraps : Manuedesign e Saskia.
Plugins Utilizados:
Filters unlimited / Mura’s seamless
Mura’s seamless /Shift at arch
Toadies / What are you?
Filters Unlimited / Paper textures
Cores Utilizadas : Foreground cor #e2dcdb - Background cor #57555e
1. Abra uma nova imagem transparente de 900 X 500 pixels
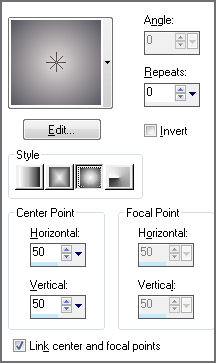
2. Preencha com um gradiente estilo Sunburst , como segue:
3. Effects / Plugins / Filters unlimited / Mura’s seamless / Mirror diagonal.
4. Effects / Plugins /Filters unlimited / Mura’s seamless / Shift at arch.
5. Effects / Edge Effects / Enhance.
6. Layers / New raster layer.
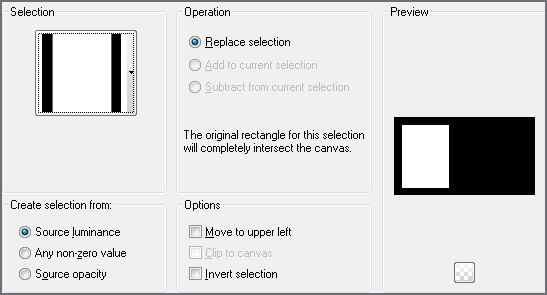
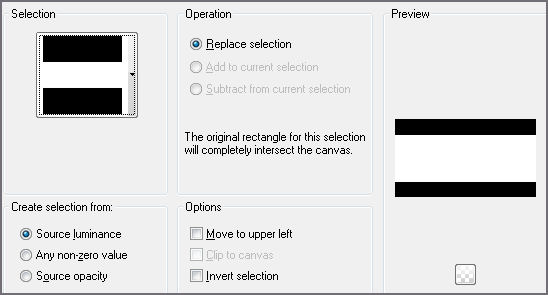
7. Selections / Load save selection / Load selection from disk: ro_louise_sélection1
8. Preencha a seleção com o mesmo gradiente que usamos na etapa 2.Mantenha a seleção
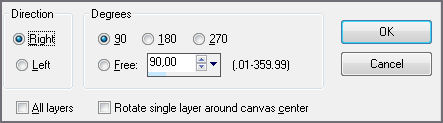
9. Effects / Plugins / Mura’s seamless /Shift at arch.
10. Effects / Edge Effects / Enhance More.
11. Selections / Modify / Contract / 15 Pixels.
12. Copie e Cole o tube ou misted como nova layer.
Posicione no centro da seleção.
13. Selections / Invert.Delete no teclado.
Selections / Select None.
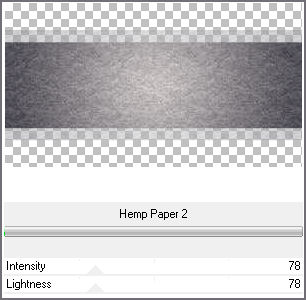
Layers / Merge / Merge down.
14. Effects / 3D Effects / Drop Shadow: 0/0/85/20/preto.
15. Layers /Duplicate.16. Image /Resize / 80%... Resize All Layers ... Desmarcado.
17. Image / Mirror.
18. Layers / Duplicate.19. Ative a layer <<Copy of raster2>>
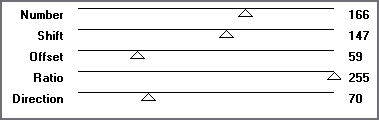
20. Effects /Plugins / Toadies / What are you? 20/20 ( 2 vezes)
21. Image /Free Rotate.
22. Effects / Edge Effects / Enhance More.
23. Ative a layer <<raster 1>>
Layers / New Raster layer.
24. Selections / Load save selection / Load selection from disk: ro_louise_sélection2
25. Preencha com o mesmo gradiente.Selections / Select None.
26. Effects / Plugins / Toadies / What are you? 20/20
27. Blend Mode / Multiply
28. Effects / Plugins / Filters Unlimited / Paper textures / Hemp paper2.
29. Ative a layer <<raster 3>>
30. Copie e Cole o elemento « manuedesigns_naturescharm_élément62 ».
Não Mova!31. Ative a layer superior.
32. Copie e Cole o elemento « saskia_darksideonthemoon_wa3 ».
Colorize se desejar.
Posicione como no modelo.33. Layers / New raster layer.
Selections / select All.
34. Copie e Cole na seleção o elemento « manueelement17 »
35. Image / Resize / 110%... Resize All layers ... Desmarcado.
36. Image / Add borders / Symmetric Marcado / 2 pixels cor do background.
37. Assine seu trabalho.
Salve como jpg© Tutorial Traduzido por Estela Fonseca em 20/07/2011.
Obrigada, Rose Orange por me permitir traduzir seus trabalhos.