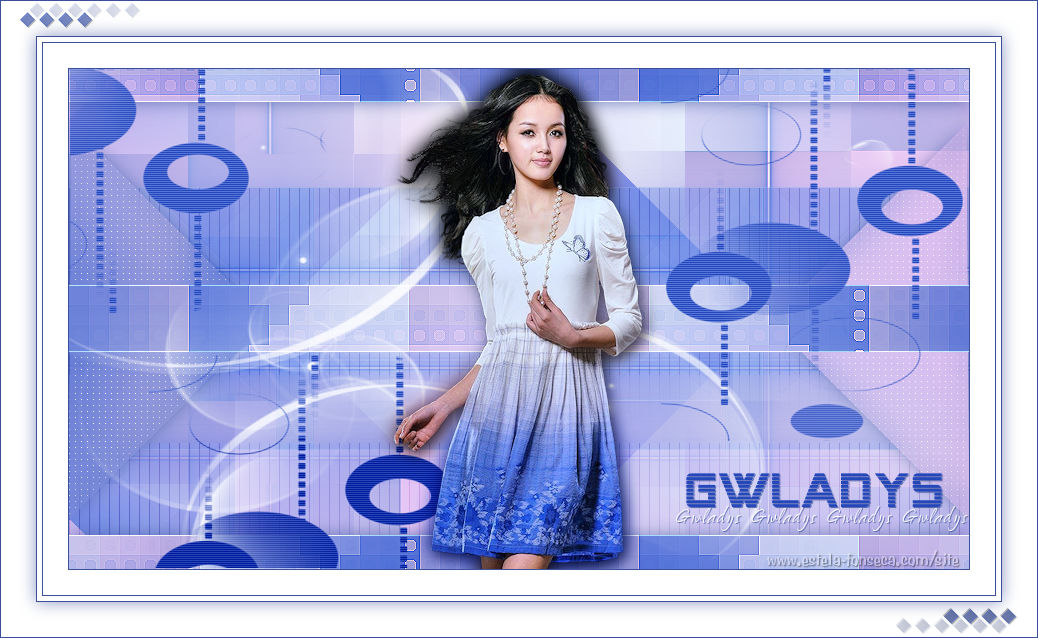
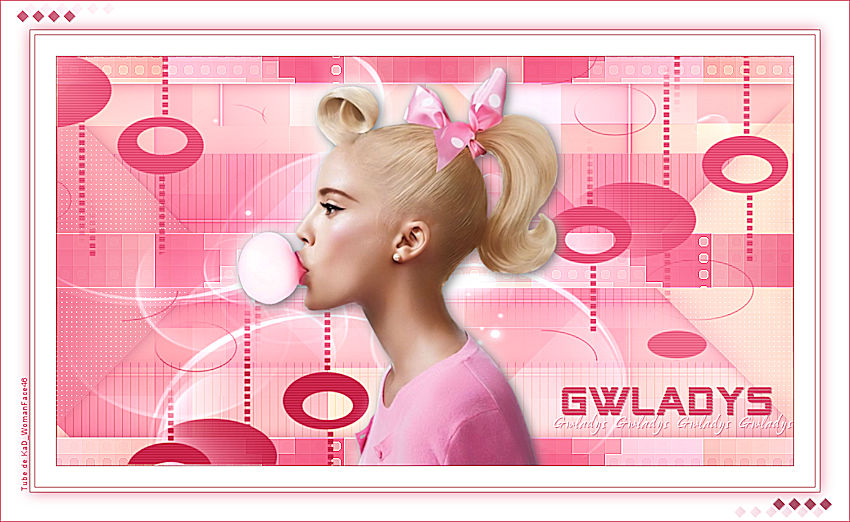
GWLADYS
Tutorial de Violette Graphic , original, Aqui.

Tutorial realizado no PSP X9 mas pode ser feito em versões anteriores do PSP.
Materiais Necessários:
Tube de Franiemargot
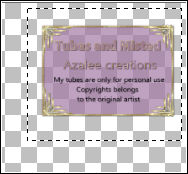
Mask de OBG_MASK_229.jpg
Demais Materiais de @Violette
Plugins Utilizados: AQUI
Mehdi/Wavy lab 1.1
Toadies/Weaver / What are you??
Medhi/Sorting Tiles
Simple/Blintz
AP Lignes/ Silverlining /Line Options Vertical /Dotty grid
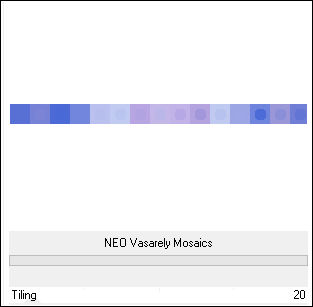
&<Bkg Designer sf10 II /NEO Vasarely Mosaics
Alien Skin Eye Candy 5 /Impact Perspective Shadow
Preparação:
Abra os tubes no PSP, duplique e feche os originais.
Abra a Mask no PSP e Minimize
Seleções em Canal Alfa
Dê dois cliques no preset do Alien Skin , ele será importado para a pasta do plugin.
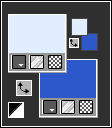
1 - Abra a tabela de cores no PSP e Minimize2 - Primeiro Plano cor #e1edfd / Segundo Plano Cor #2c58ca
3 - Abra a layer transparente <<Vyp_Alpha_Gwladys.pspimage>>Window / Duplicate
Feche a original
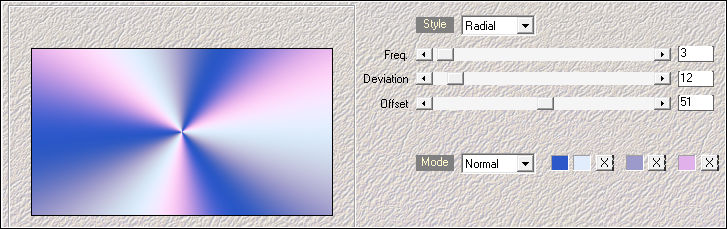
Effects / Plugin / Mehdi / Wavy Lab 1.1 :
Atenção: Esse filtro capta as cores de Segundo e Primeiro Plano ...
As cores do terceiro e do quarto quadradinho você precisa mudar: #979bca e #e2b3e7
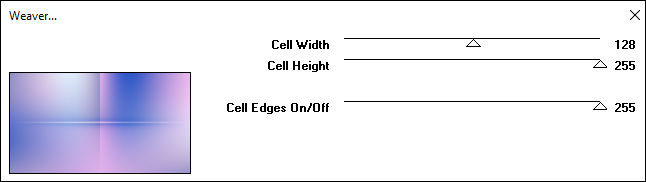
4 - Effects / Plugin / Toadies / Weaver:
Effects / Edge Effects / Enhance
5 - Effects / Plugin / Medhi / Sorting Tiles:
6 - Effects / Plugin / Simple / Blintz
Layers / DuplicateImage / Mirror / Mirror Vertical ( Image / Flip)
Opacidade / 50%
Blend Mode / OverlayLayers / Merge / Merge Down
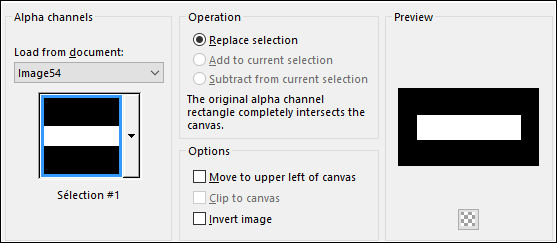
7 - Selections / Load-Save Selection / Load Selection From Alpha Channel: Selection#1
Selections / Promote Selection to Layer
Selections / Select None
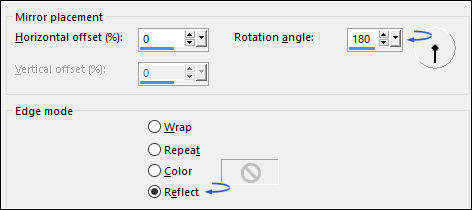
Effects / Reflection Effects / Rotating Mirror
Effects / Edge Effects / Enhance
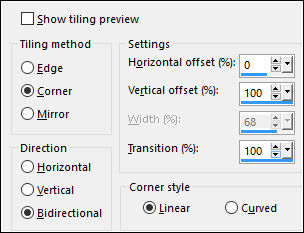
Effects / Image Effects / Seamless Tiling
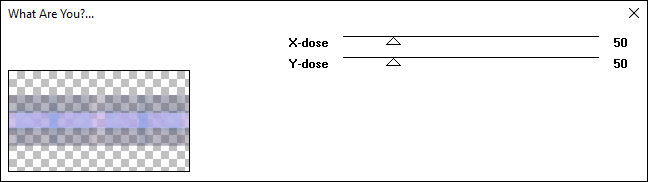
Effects / Plugin / Toadies / What are you?
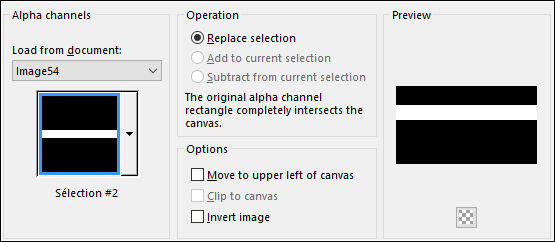
8 - Selections / Load-Save Selection / Load Selection From Alpha Channel: Selection#2
Selections / Promote Selection to Layer
Selections / Select None
Layers / Duplicate
Image / Mirror / Mirror Vertical (image-Flip)
Layers / Merge / Merge Down
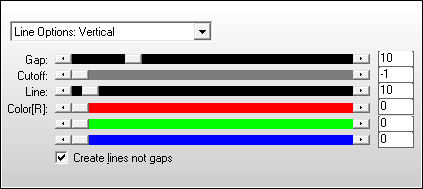
Effects / Plugin / AP [Lines] / Lines-Silverlining / Line Options Vertical
Effects / 3D Effects / Drop Shadow: 0/0/80/25/cor #3a509a
9 - Ative a Layer do Fundo
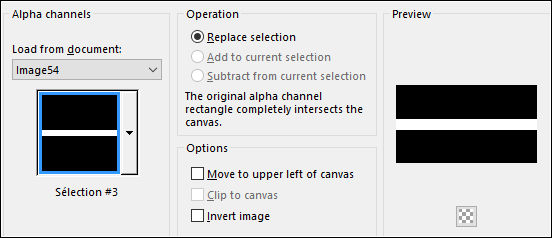
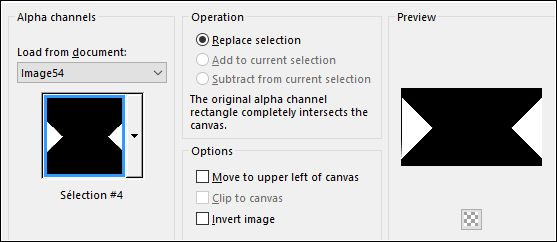
Selections / Load-Save Selection / Load Selection From Alpha Channel: Selection#3
Selections / Promote Selection to Layer
Selections / Select None
Layers / Arrange / Bring to Top
Effects / Reflections Effects / Rotating Mirror ( Configurações de antes)
Selections / Load-Save Selection / Load Selection From Alpha Channel: Selection#3
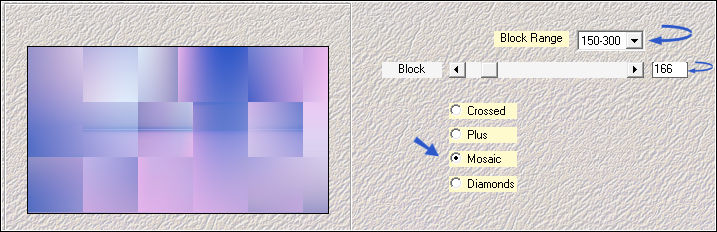
Effects / Plugin / <I.C.NET Software> Filters Unlimited 2 / &<Bkg Designer sf10 II> /NEO Vasarely Mosaics
Selections / Select None
Effects / Edge Effects / Enhance
Layers / Duplicate
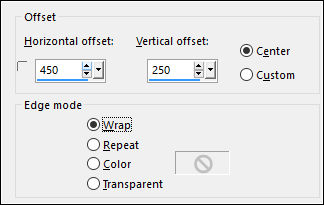
Effects / Image Effects / Offset
Effects / 3D Effects / Drop Shadow: 0/0/80/25/cor #3a509a
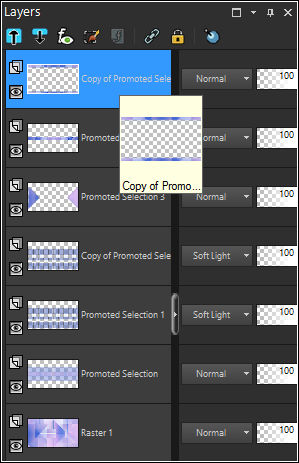
10- Ative a Layers <<Promoted Selection 1>>
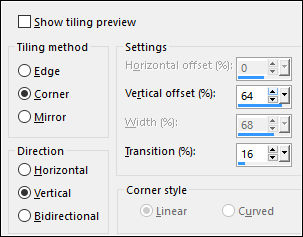
Effects / Image Effects / Seamless Tiling
Image / Mirror / Mirror Vertical (image-Flip)
Blend Mode / Soft Light
Layers / Duplicate
10 - Ative a Layer do Fundo
Selections / Load-Save Selection / Load Selection From Alpha Channel: Selection#4
Selections / Promote Selection to Layer
Adjust / Blur / Gaussian Blur / Radius 25
Selections / Select None
Layers / Arrange / Move Up ( 3 vezes)
Layers / Duplucate
Layers / Merge / Merge Down
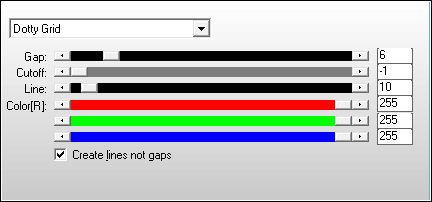
Effects / Plugin / AP [Lines] / Lines -Silverlining / Doty Grid
Selections / Select None
Effects / 3D Effects / Drop Shadow: 0/0/80/25/cor #3a509a
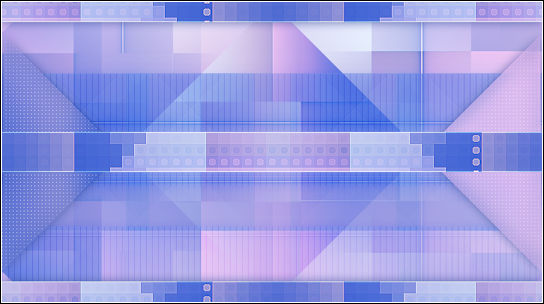
Resultado:
11 - Ative a layer do Topo
Layers / New Raster LayerPreencha com a cor #ffffff
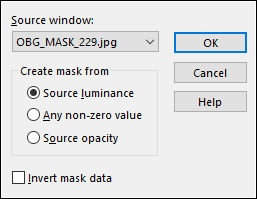
Layers / New Mask Layer / From Image: OBG_MASK_229.jpg
Layers / Merge / Merge Group12 - Maximize o tube << Vyp_Gwladys_Deco1.pspimage>>
Copie e Cole Como Nova Layer
13 - Maximize o tube <<Femme-1739-Azalee.png>>
Copie e Cole Como Nova LayerNota: Não esqueça de apagar a Marca D'água
Image / Resize / 65% ... Resize All Layers ...Desmarcado
Image / Resize / 80% ... Resize All Layers ...Desmarcado
Ferramenta <<Pick Tool>> Posicione
Tecle em <<A>> para sair da Ferramenta
Layers / Duplicate
Ative a Layer original (Raster 3)
Adjust / Blur / Gaussian Blur / Radius 10
Blend Mode / Multiply
Ative a Layer do Topo
Effects / Plugin / Alien Skin Eye Candy 5 /Impact / Perspective Shadow / preset Vyp_shadow_Gwladys01.f1s
15 - Ative o tube <<Vyp_Gwladys_text01.pspimage>>
Copie e Cole Como Nova LayerPosicione no canto inferior direito:
16 - Image /Add Borders / Symmetric Marcado / 1 pixel cor #3a509a
Image /Add Borders / Symmetric Maarcado / 25 pixels cor #ffffffImage /Add Borders / Symmetric Marcado / 1 pixel cor #3a509a
Image /Add Borders / Symmetric Marcado/ 5 pixels cor #ffffff
Image /Add Borders / Symmetric Marcado / 1 pixel cor #3a509a17 - Selections / Select All
Image / Add Borders / Symmetric Marcado / 35 pixels cor #ffffff
Effects / 3D Effects / Drop Shadow: 0/0/60/25/cor #3a509a
Selections / Select None18 - Ative o tube << Vyp_Gwladys_Deco2.pspimage>>
Copie e Cole como nova layer
Image /Add Borders / Symmetric Marcado / 1 pixel cor #3a509a
19 - Coloque a sua assinatura
20 - Layers / Merge / Merge All (Flatten)21 - Exporte como JPG
Versão com tube de KaD:
©Tutorial traduzido por Estela Fonseca em 14/05/2017.
Não alterar nem repassar sem autorização.