.jpg)
Tutorial realizado no Corel PaintShop Pro X9, mas pode ser feito em outras versões do PSP
Materiais Necessários:
Tubes de Tocha. AQUI.
Vyp_selections_JanaMask de Narah <<Masque Narah_mask_0724.jpg>>
Fonte << Cleveland Litho NF >>
© Demais materiais de Violette**
Os tubes são oferecidos para uso pessoal
Você não tem permissão para colocar esses tubes em outro site sem a permissão do criador.**
Plugins Utilizados:
Simple / Pizza Slice Mirror
Visual Manipulation / Transmission
&< BKG Designers sf10 IV > /Instant Tile
L&K / Katarina
Innovations / Wave City
Graphic Plus /Cross Shadow
Preparação:Abra os tubes no PSP, duplique e feche os originais.
Abra a Mask no PSP e Minimize.Copie as seleções para a pasta de seleções do PSP.
Dê dois cliques no preset <<Vyp_shadow_jena2>> ele será automaticamente importado para a pasta do plugin.
Cores do Tutorial:
01- Primeiro Plano cor #c9e7eb / Segundo Plano cor #258fab
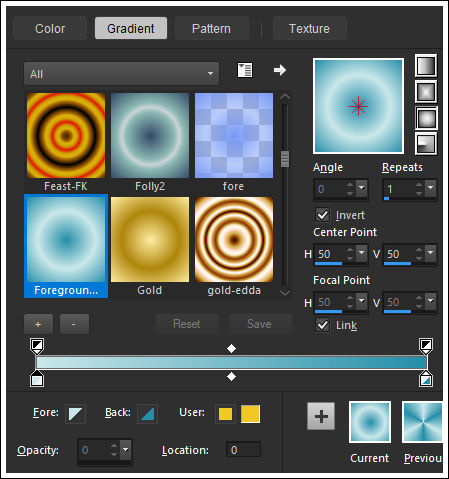
Configure um Gradiente <<Sunburst>> como segue:
02 - abra uma nova imagem transparente de 900/650 Pixels
Preencha com o Gradiente
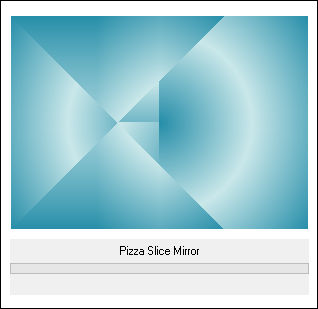
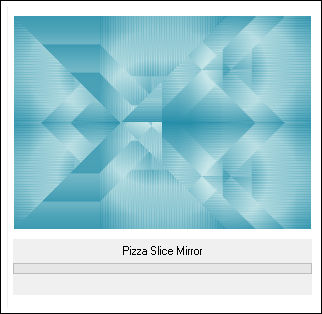
03 - Effects / Plugins / Simple / Pizza Slice Mirror
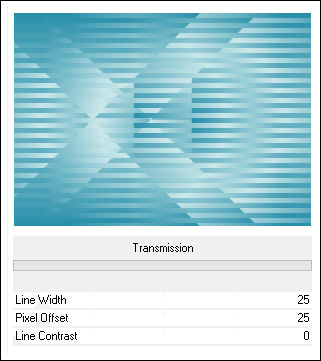
Effects / Plugins / Visual Manipulation / Transmission:
04 - Effects / Plugins / <I.C.NET Software> Filters Unlimited 2 / &< BKG Designers sf10 IV > /Instant Tile:
Effects / Plugins / Simple / Pizza Slice Mirror
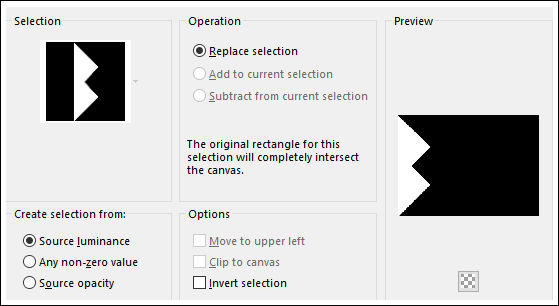
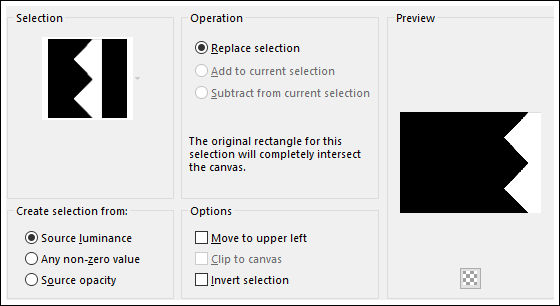
05 - Ative a Layer <<raster 1>>Selections / Load / Save Selection / Load Selection from disk: Vyp_Jena01.PspSelection
Selections / Promote selection to Layer
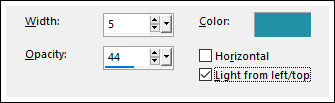
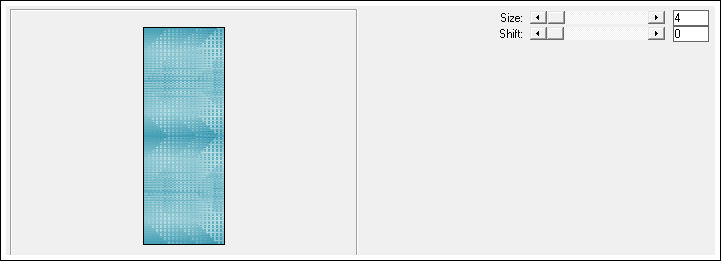
Effects / Texture Effects / Blinds
Selections / Select None
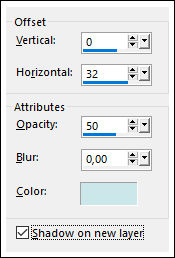
Effects / 3D Effects / Drop Shadow: 0/32/50/0/cor #c9e6ea
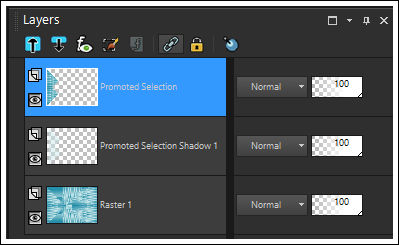
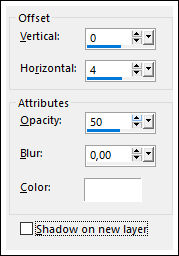
06 - Ative a layer do topo
Effects / 3D Effects / Drop Shadow: 0/4/50/0/couleur #ffffff/ shadow on new layer desmarcado
Layers / Duplicate
Blend Mode / Multiply
Layers / Merge / Merge Down
07 - Ative a Layer <<raster 1>>
Selections / Load / Save Selection / Load Selection from disk: Vyp_Jena02.PspSelection
Selections / Promote selection to layer
Effects / Plugins / L&K/ Katarina:
Selections / Select None
Effects / 3D Effects / Drop Shadow: 0/-4/50/0/cor #ffffff
08 - Layers / Duplicate
Blend Mode / Multiply
Layers / Merge / Merge Down
Layers / Arrange / Bring to top
09 - Ative a Layer <<raster 1>>
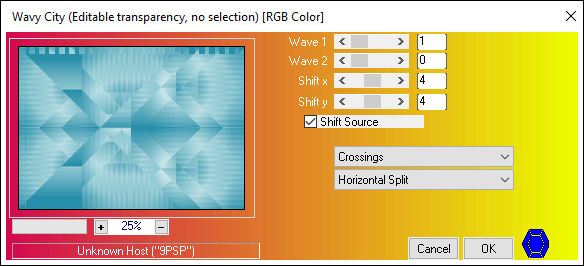
Effects / Plugins / Innovations 1.5 /Wave City:
10 - Ative a Layer do Topo
Layers / New Raster Layer
Preencha com a cor #ffffff
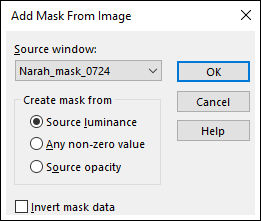
Layers / New Mask Layer / From Image: Narah_mask_0724.jpg
Image / Mirror / Mirror Horizontal
Layers / Duplicate
Layers / Merge / Merge Group
11 - Ative o tube <<Vyp_jena_deco01.pspimage>>
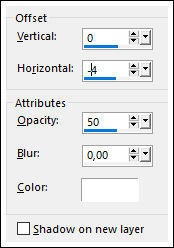
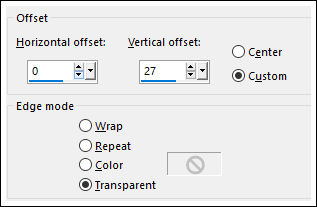
Copie / Cole como nova layerEffects / Image Effects / Offset:
12 - Ative o tube <<Tocha24782.pspimage>>
Copie / Cole como nova layerImage / Resize / 80%... Resize All Layers ... Desmarcado
Image / Resize / 85%... Resize All Layers ... Desmarcado
Adjust / One Step Foto Fix
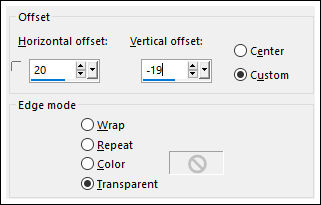
Effects / Image Effects / Offset
Layers / Duplicate
Ative a Layer <<raster 3>>
Adjust / Blur / Gaussian Blur / Radius 25
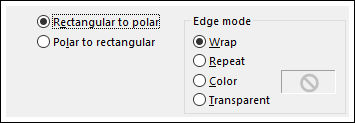
Effects / Distortion Effects / Polar Coordinates:
Image / Mirror / Mirror Vertical
Blend Mode / Screen
Opacidade / 47%
13 - Ative a Layer do topo
Effects / Plugins / Alien Skin Eye Candy 5 / Impact / Perspecitve Shadow / preset Vyp_shadow_jena01.1Fs
14 - Ative a Ferramenta <<Texto>> Fonte <<Cleveland Litho NF >> Tamanho: 60 como segue:
Feche a cor do Primeiro Plano / Segundo Plano cor #ffffffDigite com letras maiúsculas o texto: JENA
ApliqueLayers / Converta a layer <<Vector>> em Raster
Effects / 3D Effects / Drop Shadow: 0/-4/50/0/cor #ffffff
Effects / 3D Effects / Drop Shadow: 1/1/25/1/cor #08537415 - Image / Add Borders / Symmetric Marcado / 1 pixel cor #29647d
16 - Image / Add Borders / Symmetric Marcado / 5 pixels cor #ffffff
17 - Image / Add Borders / Symmetric Marcado / 1 pixel cor #29647d
18 - Image / Add Borders / Symmetric Marcado / 20 pixels cor #ffffff
19 - Image / Add Borders / Symmetric Marcado / 45 pixels cor #29647d
Selecione a borda com a varinha mágica (Feather e Tolerance : 0 / RGB Value e Inside Marcado)Effects / Plugins / Graphic Plus / Cross Shadow / Default
Selections / Invert
Effects / 3D Effects / Drop Shadow: 0/0/50/25/cor #000000
20 - Image / Add Borders / Symmetric Marcado / 1 pixel cor #ffffff
21 - Coloque a sua assinatura
22 - Layers / Merge / Merge All (Flatten)
23 - Exporte como JPEG Otimizado!
Versão com tube de MR (Maryse):
©Tutorial traduzido por Estela Fonseca em 03/07/2020.
Não alterar nem repassar sem autorização.