.jpg)
Tutorial realizado no Corel PaintShop Pro X9, mas pode ser feito em outras versões do PSP
Materiais Necessários:
Tubes de Azalée , seu site, AQUI.
Mask : valentin1_sigrid.jpg
Preset : Vyp_Valentin_shadow.f1s
Seleções em canal alfa: Vyp_Alpha_Valentin.pspimage
Demais materiais de @Violette
***
O uso dos tubes está sujeito a autorização do autor.
***
Plugins Utilizados:
Medhi / Wavy Lab1.1 & Sorting Tiles
Unlimited 2 / &<BkgDesigners sf10I> Blueberry Pie / &<BkgDesigners sf10 I> CruncherCarolaine & Sensibility /CS-HLines & CS-texture & CS-LDots
Alien Skin Eye Candy 5 Impact
Preparação:Abra os tubes no PSP, duplique e feche os originais.
Abra a Mask no PSP e Minimize.
Dê dois cliques no preset do Alien Skim para instalá-los automaticamente na pasta do Plugin.
Cores do Tutorial:
1 - Primeiro Plano cor #d1dbe5 / Segundo Plano cor #3b4254
2- Abra a layer <<Vyp_Alpha_Valentin.pspimage>>
Window / Duplicate
Feche a original e continue trabalhando na cópia
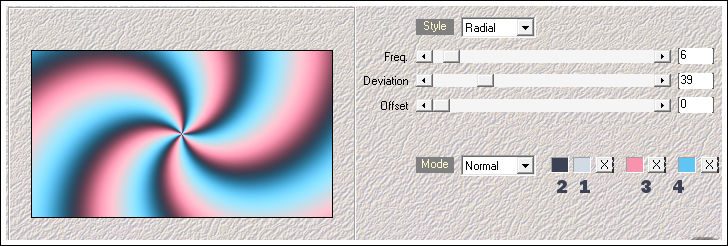
3- Effects / Plugins / Medhi/ Wavy Lab1.1
Adjust / Blur / Gaussian Blur / Radius 25
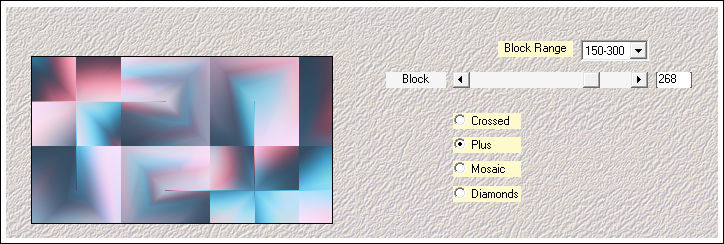
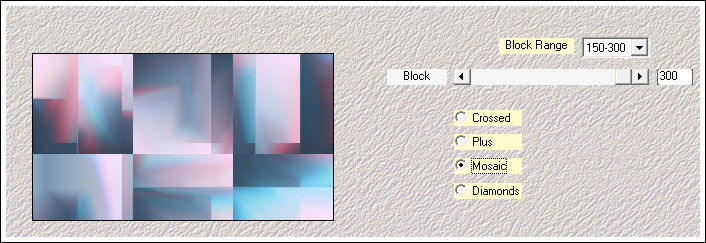
4 - Effects / Plugins / Mehdi / Sorting Tiles
Layers / Duplicate
Effects / Plugins / Mehdi / Sorting Tiles
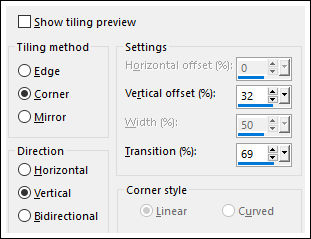
5 - Effects / Image Effects / Seamless Tiling
Effects / Geometric Effects / Skew
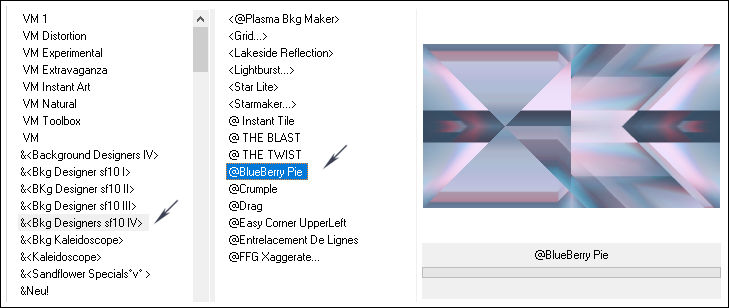
6- Effects/ Plugins / <I.C.NET Software> Filters Unlimited / &<BkgDesigners sf10 IV> / @Blueberry Pie
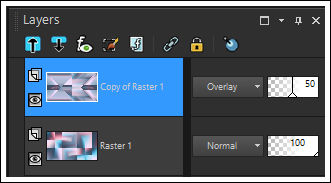
Blend Mode / Overlay
Opacidade / 50%
Layers / Duplicate
Layers / Merge / Merge Visible
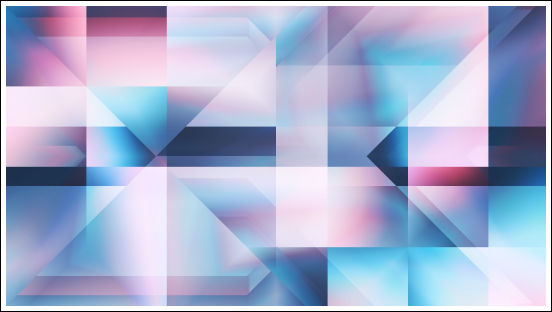
Resultado:
6 - Na Layer Merged (Raster 1)
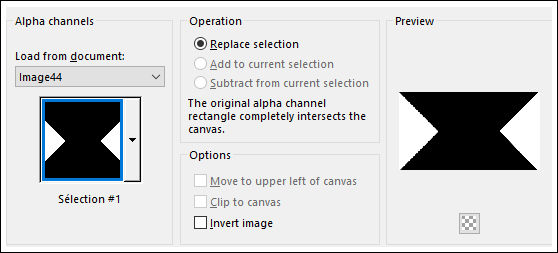
Selections / Load save selection / Load selection from alpha channel: Selection #1
Selections / Promote selection to layer
Adjust / Blur / Gaussian Blur / Radius 15
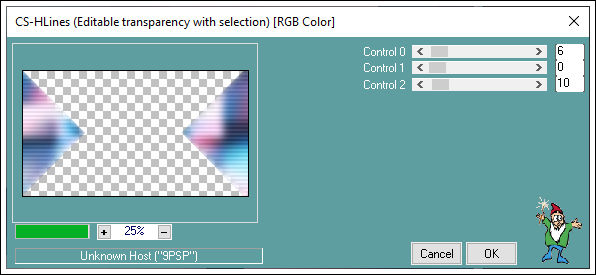
Effects / Plugins / Carolaine & Sensibility /CS-HLines:
Effects / Edge Effects / Enhance
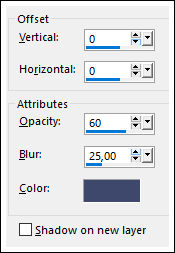
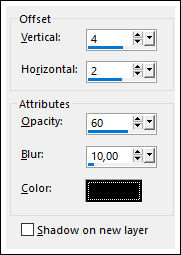
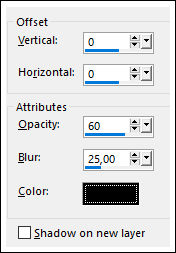
Effects / 3D Effects / Drop Shadow: 0 / 0 / 60 / 25 / Cor #3e486c
Selections / Select None7 - Ative a layer <<Merged>>
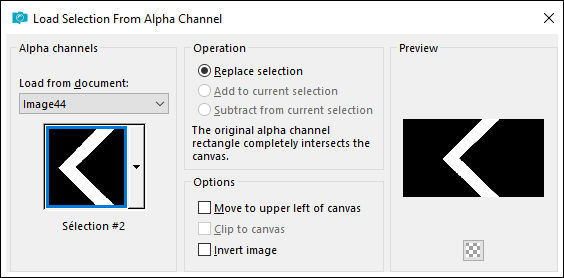
Selections / Load save selection / Load selection from alpha channel: Selection #2
Selections / Promote Selection to Layer
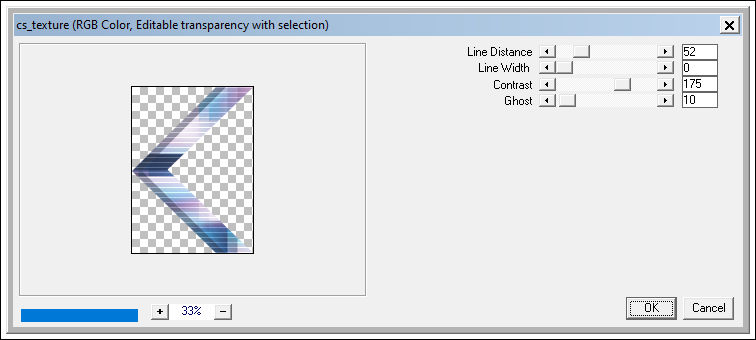
Effects / Plugins / Carolaine & Sensibility / CS-texture
Effects / 3D Effects / Drop Shadow: 0 / 0 / 60 / 25 / Cor #3e486c
Selections / Select None8 - Ative a Layer <<Merged>>
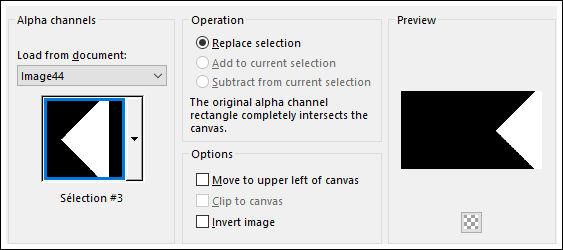
Selections / Load save selection / Load selection from alpha channel: Selection #3
Selections / Promote selection to layer
Selections / Select None
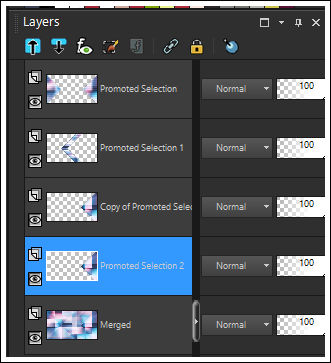
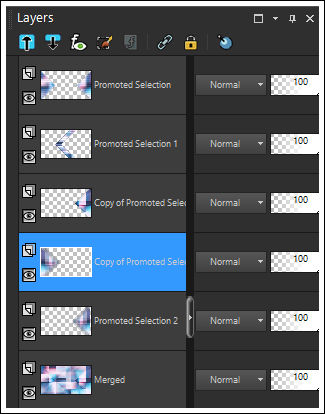
Layers / Duplicate
Ative a Layer <<Promoted selection 2 >>
Effects / Plugins / <I.C.NET Software> Filters Unlimited 2 / &<BkgDesigners sf10 I> Cruncher
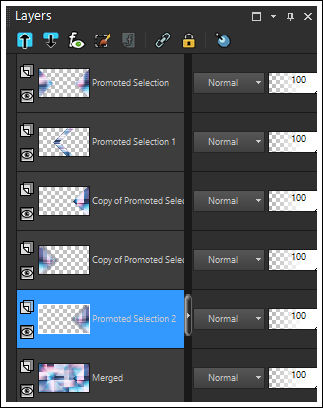
9 - Layers / Duplicate
Image / Mirror / Mirror Horizontal
Ative a Layer <<Promoted selection 2>>
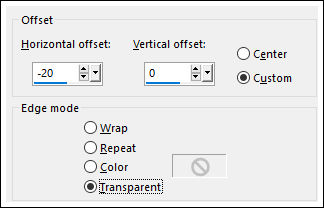
Effects / Image Effects / Offset:
Ative a Layer imediatamente acima dessa, como segue:
Layers / Merge / Merge DownAdjust / Sharpness / Sharpen
10 - Ative a layer imediatamente acima dessa << Copy of Promoted selection 2>>
Effects / 3D Effects / Drop Shadow: 0 / 0 / 60 / 25 / Cor #3e486c
11 - Ative a Layer <<Merged>>
Effects / Plugins / Carolaine & Sensibility / CS-LDots:
12 - Ative a layer do topo
Layers / New Raster Layer
Preencha com a cor #ffffff
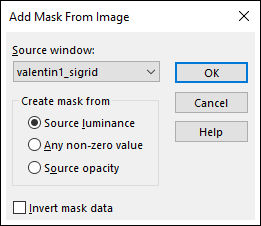
Ative a Mask << valentin1_sigrid.jpg>> Minimize
Layers / New Mask Layer From Image : masque valentin1_sigrid.jpg
Layers / Duplicate
Layers / Merge / Merge Group
13 - Ative o tube <<FB2StringEl01.png>>
Copie e Cole como nova layerImage / Resize / 50%... Resize All Layers ... Desmarcado
Pick Tool (K) Posição X (672) Posição Y (406) Para sair da Pick Tool Letra "M"
Effects / 3D Effects / Drop Shadow: 4/2/60/10/cor #000000
14 - Ative o tube << Vyp_Valentin_deco01.pspimage>>
Copie e Cole como nova layer
Blend Mode / Overlay
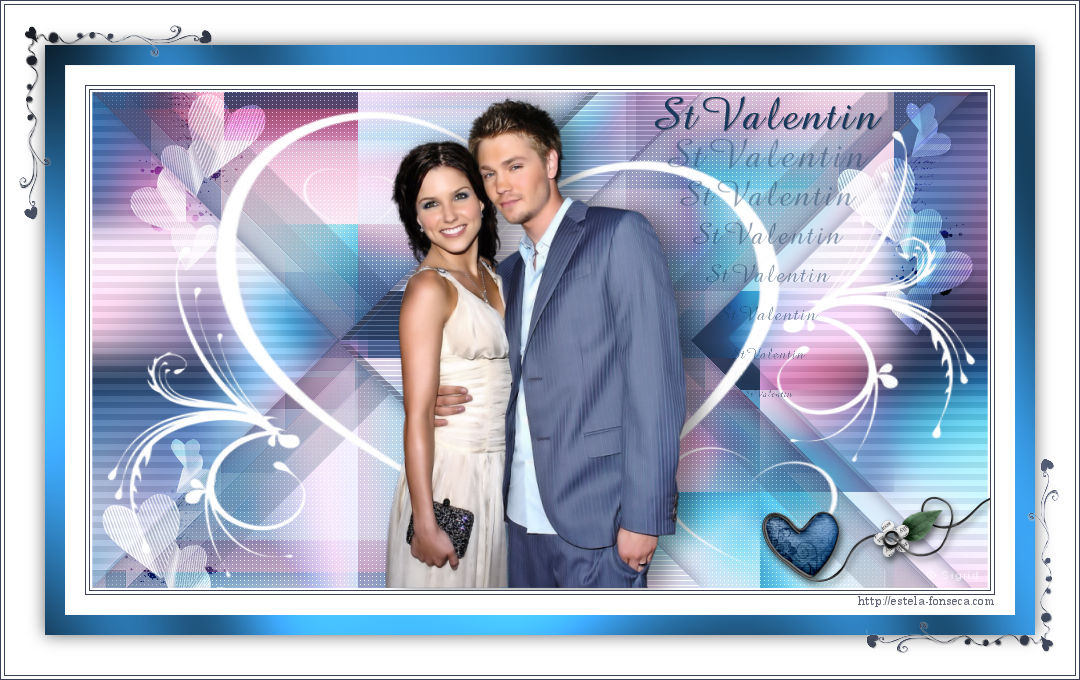
12 - Ative o tube <<couple-101-Azalee.png>>
Copie e Cole como nova layer
Image / Resize /75%... Resize All Layers ... Desmarcado
Image / Resize / 80%... Resize All Layers ... Desmarcado
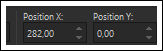
Pick Tool (K) Posição X (282) Posição Y (0) Para sair da Pick Tool Letra "M"
Effects / Plugins / Alien Skin Eye Candy 5 /Impact / Perspective Shadow / preset Vyp_Valentin_Shadow01.f1s13 - Ative o tube << déco Vyp_Valentin_texte.pspimage>>
Copie e Cole como nova layer
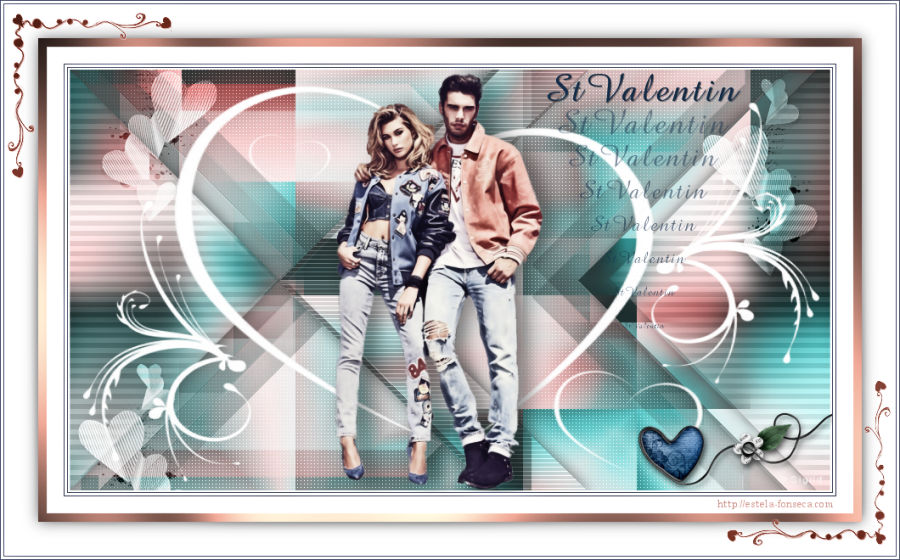
Posicione como no modelo do topo desta página.
14 - Image/Add Borders / Symmetric Marcado / 1 pixel cor #3b4254
Image/Add Borders / Symmetric Marcado / 3 pixels cor #ffffff
Image/Add Borders / Symmetric Marcado / 1 pixel cor #3b425415 - Image/Add Borders / Symmetric Marcado / 20 pixels cor #ffffff
Image/Add Borders / Symmetric Marcado / 10 pixels cor #2d7bb6
Ative a Varinha Mágica e selecione esta bordaEffects / Plugins / Graphic Plus / Cross Shadow / Default
16 - Selections / Select All
Image/Add Borders / Symmetric Marcado / 40 pixels cor #ffffff
Effects / 3D Effects / Drop Shadow: 0/0/60/25/cor #000000
Selections / Select None17 - Image/Add Borders / Symmetric Marcado / 1 pixel cor #3b4254
Image/Add Borders / Symmetric Marcado / 3 pixels cor #ffffff
Image/Add Borders / Symmetric Marcado / 2 pixels cor #3b425418 - Ative o tube <<Vyp_Valentin_Deco02.pspimage>>
Copie e Cole como nova imagem19 - Coloque a sua assinatura
20 - Layers / Merge / Merge All
21 - Exporte como JPG Otimizado!!!Versão com tube de Beatrice:
©Tutorial traduzido por Estela Fonseca em 01/02/2020.
Não alterar nem repassar sem autorização.