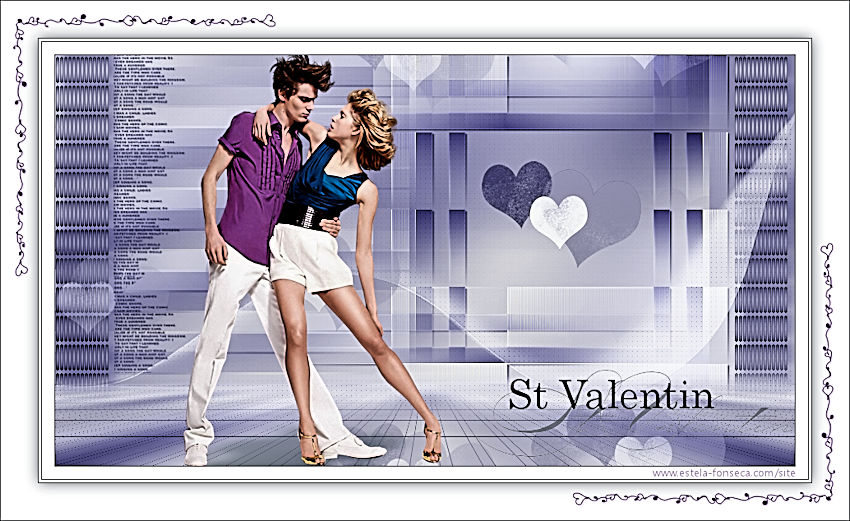
VALENTIN
Tutorial de Violette Graphic , original, Aqui.

Tutorial realizado no PSP X9 mas pode ser feito em versões anteriores do PSP.
Materiais Necessários:
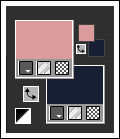
Tube de Karin (Kadsdpspdesign )
Mask de Animabelle
Demais materiais de @Violette
Plugins Utilizados:
Medhi/Waby Labs/ Sorting Tiles
Toadies/Ommadawn/Plain Mosaic 2/Weaver
Mura's Meister/perspectives Tiling
VM Distorsion/Vision Impossible
Italian Editors Effects/Effeto Fanstasma
AP Lines/ Silverlining /Dotty Grid
Alien Skin Eye Candy 5 /Impact /Glass
Preparação:
Abra os tubes no PSP, duplique e feche os originais.
Abra a Mask no PSP e Minimize
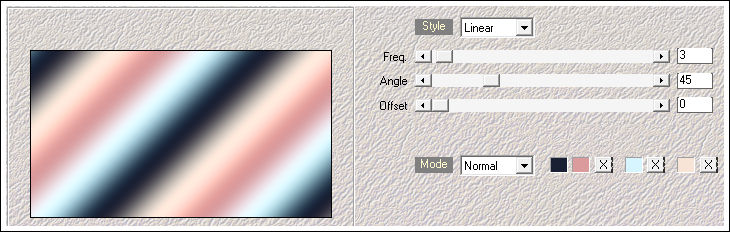
Duplo clique no preset do plugin Alien Skin
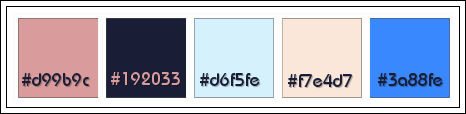
Tabela de Cores:
1 - Primeiro Plano cor #db9b9c / Segundo Plano cor #192033
2 - Abra uma Nova imagem transparente de 900/500 pixels
Effects / Plugins/ Medhi / Waby Labs 1.1
Cores: #192033 / #db9b9c / #d6f5fe/ #f7e4d7
Adjust / Blur / Gaussian Blur / Radius 30 ( 2 vezes)
Effects / Image Effects / Seamless Tiling
Effects / Edge Effects / Enhance
3 - Layers / Duplicate
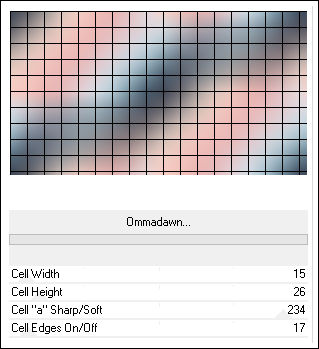
Effects / Plugins / Toadies / Ommadawn
4 - Layers / Duplicate
Image / Mirror / Mirror Horizontal
Opacidade / 50%
Layers / Merge / Merge Down
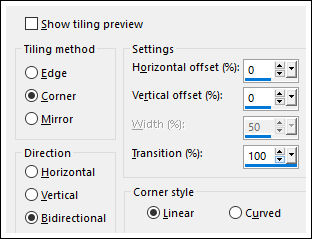
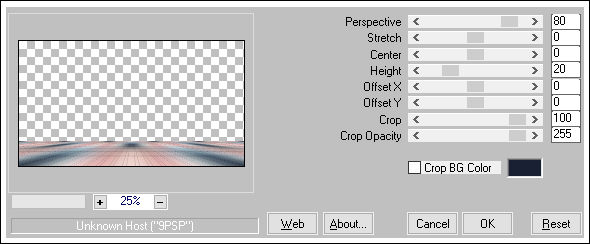
5 - Effects / Plugins /Mura's Meister /Perspectives Tiling:
Ative a Varinha Mágica e selecione a parte transparente
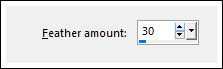
Selections / Modify / Feather/ 30
Delete no teclado ( Tecle duas vezes)Selections / Select None
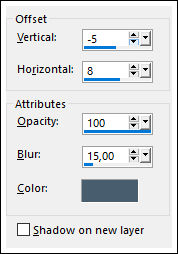
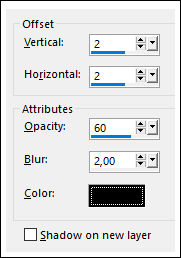
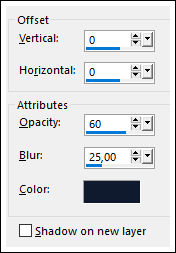
Effects / 3D Effects / Drop Shadow:Cor #485d6e
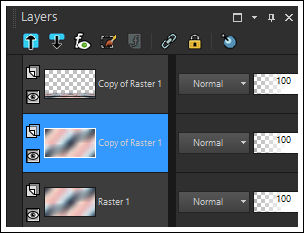
6 - Ative a Layer <<Raster 1>>
Layers / Duplicate
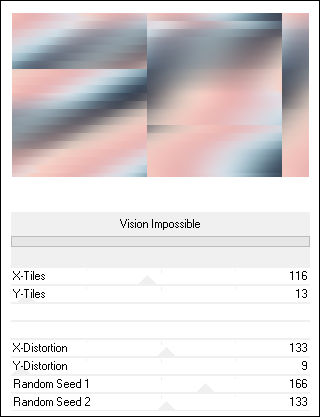
Effects / Plugins / VM Distorsion / Vision Impossible
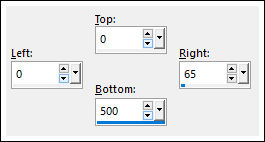
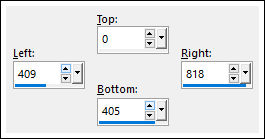
7 - Selection Tool (S) / Custom Selection
Selections / Promote Selection to Layer
Adjust / Blur / Gaussian Blur / Radius 30
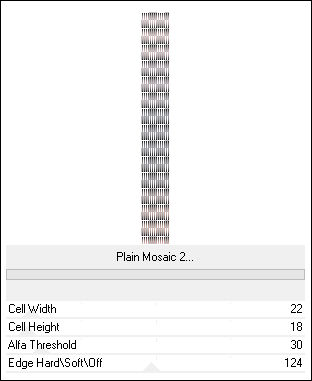
Effects / Plugins / Toadies / Plain Mosaic 2
Selections / Select None
8 - Layers / Duplicate
Image / Mirror / Mirror Horizontal
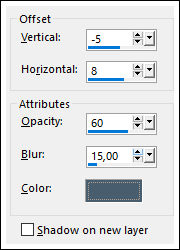
Effects / Image Effects / Offset:
Layers / Merge / Merge Down
Effects / 3D Effects / Drop Shadow: Cor #485d6e
9 - Ative a Layer <<Copy of Raster 1>>
Selection Tool (S) / Custom Selection
Selections / Promote Selection to Layer
Selections / Modify / Contract 30 pixels / Preencha com a cor #192033
Selections / Modify / Contract 20 pixels
Edit / Cut ( ou delete no teclado)
Selections / Modify / Contract 20 pixels / Preencha com a cor #192033
Selections / Modify / Contract 20 pixels
Edit / Cut (ou Delete no teclado)
Selections / Select None
Effects / Edge Effects / Enhance
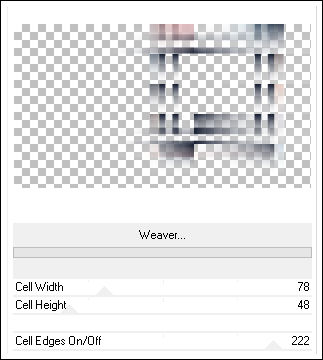
Effects / Plugins / Toadies / Weaver:
Blend Mode / Hard Light
Effects / 3D Effects / Drop Shadow: Cor #000000
10 - Ative novamente a layer <<Copy of Raster 1>>
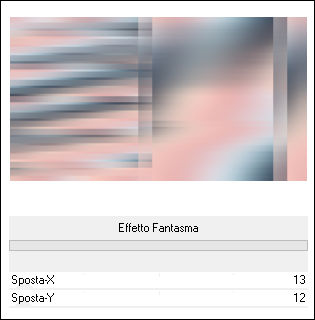
Effects / Plugins / Italian Editors Effects / Effeto Fanstasma:
11 - Ative a Layer do topo
Layers / New Raster Layer
Preencha com a cor #db9b9d
Abra a Mask <<masker animabelle.jpg>> Image / Mirror
Minimize
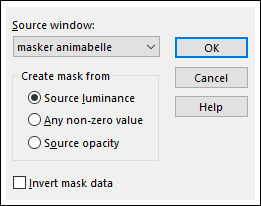
Layers / New Mask Layer / From Image: masker animabelle.jpg
Layers / Merge / Merge Group
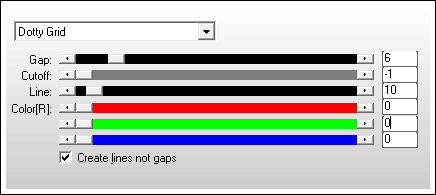
Effects / Plugins / AP Lines / Lines - Silverlining /Dotty Grid:
Blend Mode / Screen
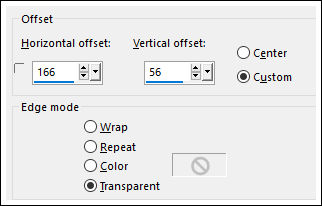
12 - Ative o tube <<Vyp_Valentin _ deco01.pspimage>> Copie e Cole como nova layer
Effects / Image Effects / Offset: Hor.= 166/Vert.= 56
Blend Mode / Luminance (Legacy)
Layers / Duplicate
Blend Mode / Soft Light
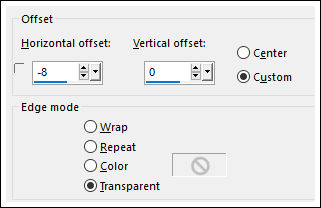
13 - Ative o tube << Vyp_Valentin _ deco02.pspimage>> Copie e Cole Como Nova Layer
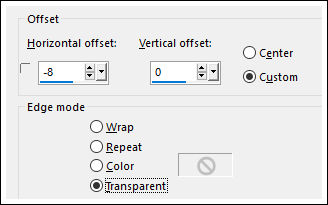
Effects / Image Effects / Offset: Hor.= -8/Vert.= 0
Blend Mode / Luminance (Legacy)14 - Layers / New Raster Layer
Preencha com a cor #3a88fe
Blend Mode / Soft LightOpacidade / 70%
15 -Ative o tube <<KaD_Couple1.png>>
Copie e Cole como nova layer
Image / Resize / 75%... Resize All Layers ... Desmarcado
Effects / Image Effects / Offset: Hor.= -110/Vert.= -10
Layers / Duplicate
Adjust / Blur / Gaussian Blur / Radius 15
Layers / Arrange / Move down
Blend Mode / Multiply
Opacidade / 80%
Ative a Layer do topo
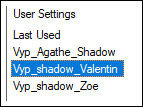
Effects / Plugins / Alien Skin Eye Candy 5 Impact /Perspective Shadow / preset <<Vyp_Shadow_Valentin.f1s>>
16 - Ative o tube << Vyp_Valentin _ text01.pspimage>> Copie e Cole como nova layer
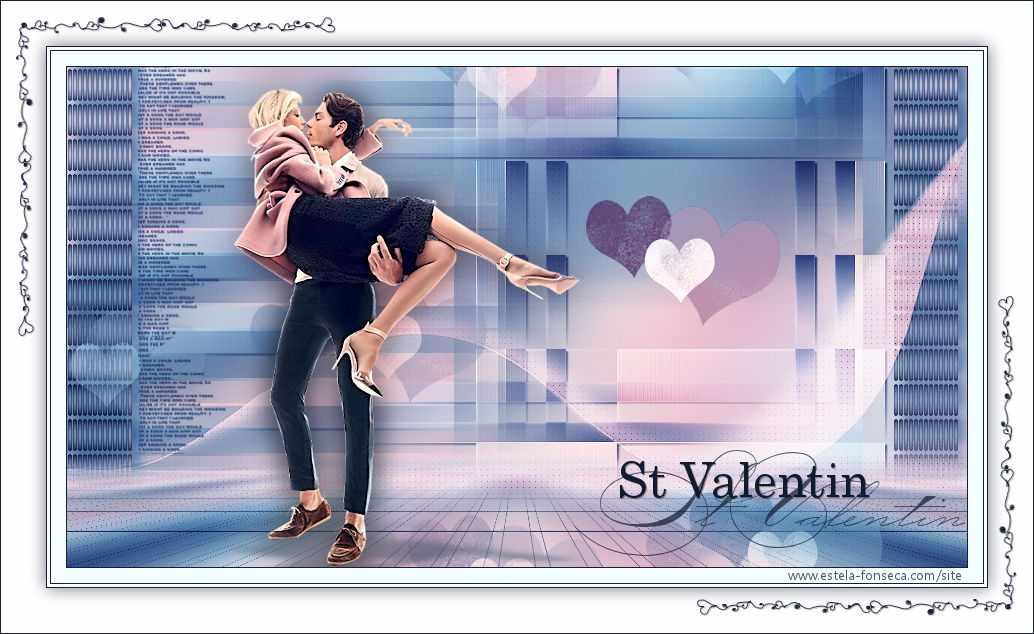
Posicione como na imagem final
17 - Image/Add Borders / Symmetric Marcado / 1 pixel cor #192033
Image/Add Borders / Symmetric Marcado / 15 pixels cor #ffffff
Image/Add Borders / Symmetric Marcado / 1 pixel cor #192033
Image/Add Borders / Symmetric Marcado / 3 pixels cor #ffffff
Image/Add Borders / Symmetric Marcado / 1 pixel cor #19203318 - Selections / Select All
Image/Add Borders / Symmetric Marcado / 45 pixels cor #ffffff
Effects / 3D Effects / Drop Shadow: Cor #000000
Selections / Select None19 - Image/Add Borders / Symmetric Marcado / 1 pixel cor #192033
20 - Ative o tube <<déco Vyp_Valentin_deco04.pspimage>> Copie e Cole como nova layer
21 - Coloque a sua assinatura
22 - Layers / Merge / Merge All (Flatten)
23 - Exporte como JPG OptizadoVersão com tube de Nikita:
©Tutorial traduzido por Estela Fonseca em 20/01/2018.
Não alterar nem repassar sem autorização.