FLAME
Tutorial de ©Elizabeth Creations
Este tutorial foi traduzido usando o Corel'Paint ShopPro' 2022 ULTIMATE.
Material Necessário:
Plugins Usados:
Filters Unlimited 2.0 / [AFS IMPORT] e Italian Editors Effects / Raggi di Luce.
Mehdi / Sorting Tiles
The Plugin Site / HyperTyle
FM Tile Tools / Blend Emboss
Lembre-se de salvar seu trabalho com regularidade.
Coloque no Primeiro Plano a cor #3b4555.
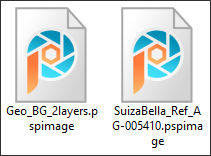
1. Abra "Geo_BG_2layers .psp" CopieCom a layer Raster 1 ativada ... Copie.
2. Abra uma nova imagem transparente de 980/730 pixels.
Selections / Select All.
3. Cole na seleção...Selections / Select None.
(Minimize... usaremos posteriormente.)
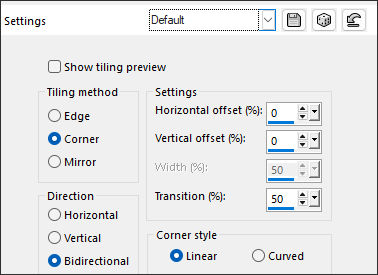
4. Effects / Image Effects / Seamless Tiling:
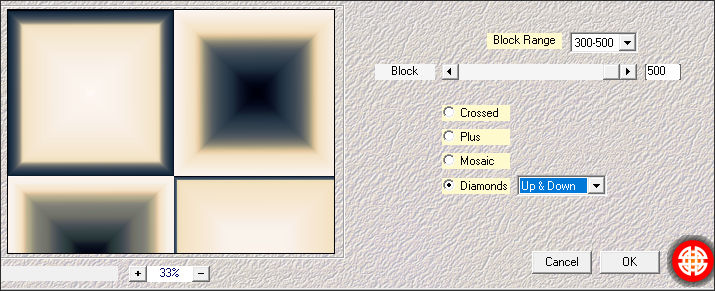
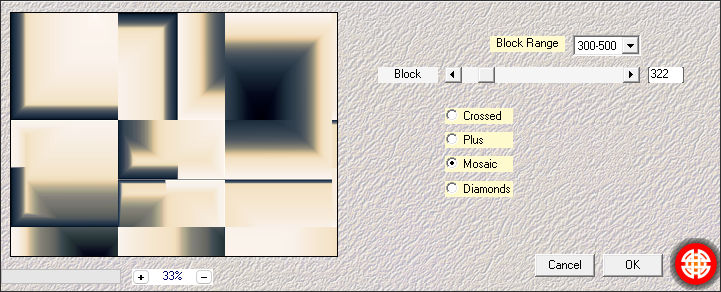
5. Effects / Plugins / Mehdi / Sorting Tiles:
6. Effects / Plugins / Mehdi / Sorting Tiles:
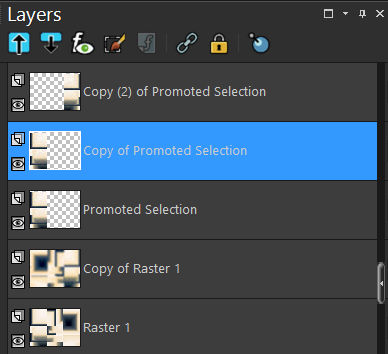
7. Layers / Duplicate.
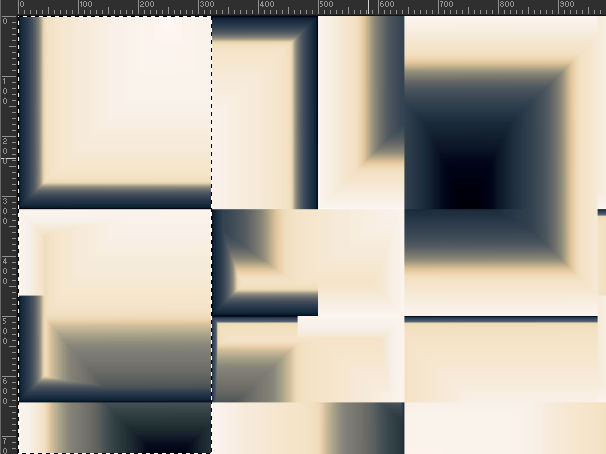
8. Activate the Selection Tool.... set with RECTANGLE and Feather to 0...draw/select the following:
9. Selections / Promote Selection to Layer.
Selections / Select None.
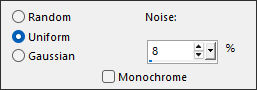
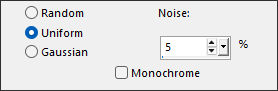
10. Adjust / Add/Remove Noise / Add Noise:
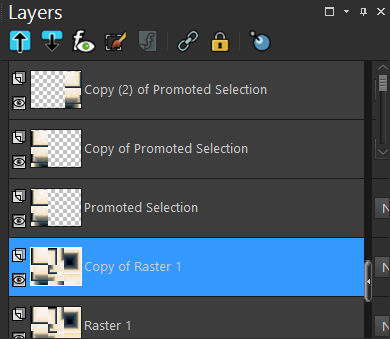
11. Layers / Duplicate 2 times.
Image / Mirror / Mirror Horizontal.
12. Activate the second from bottom layer.
Image / Mirror / Mirror Horizontal.
13. Adjust / Blur / Gaussian Blur / Radius 15.
14. Adjust / Hue and Saturation / Vibrancy 50.
15. Adjust / Add/Remove Noise / Add Noise:
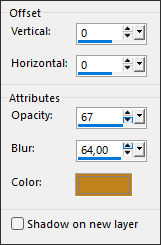
16. Activate the second from top layer...
Effects/ Filters Unlimited / Italian Editors Effects / Raggi di Luce...default.
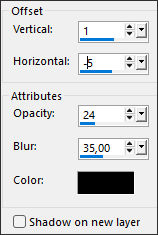
17. Effects / 3D Effects / Drop Shadow:
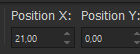
Ferramenta Pick (K) ... Position X (21,00) / Position Y (0,00)
18. Opacidade 87%.Ative a Layer do Topo
19. Maximize « Geo_BG_2layers.psp» minimizada no ponto 3Ative a Layer «misted»
Copie e Retorne ao seu trabalho
Cole como nova layer
20. Image / Resize / 90% ...Resize all Layers ...Desmarcado.Ferramenta Pick (K) ... Position X (436,00) / Position Y (-104,00)
21. Blend Mode / MULTIPLY.
22. Adjust / Hue and Saturation / Vibrancy 55.
23. Layers / New Raster Layer... Preencha com a cor do Primeiro Plano.
24. Selections / Select All.
25. Selections / Modify / Contract / 4 pixels.Delete no teclado
Selections / Select None.
26. Feche a layer do Fundo..Com qualquer uma das layers ativadas
Layers / Merge / Merge Visible.
27. Image / Resize / 90% ... Resize all layers ... Desmarcado.
28. Abra e ative a layer do Fundo.
29. Effects / Plugins / Filters Unlimited 2.0 / [AFS IMPORT] sqborder2...default.
30. Effects / Edge Effects / Enhance.
31. Ative a layer do TopoEffects / 3D Effects / Drop Shadow:#c1821e
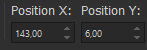
32. Abra o tube « SuizaBella_Ref_AG-005410 » Copie e cole como nova layerFerramenta Pick (K) ... Position X (143,00) / Position Y (6,00)
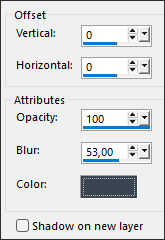
33. Effects / 3D Effects / Drop Shadow:#3b4555
34. Image / Add Borders / Symmetric Marcado / 3 pix Cor #33445615 pix cor #e3aa72
35. Magic Wand Tool com Feather e Tolerance em 0 selecione a borda externa.
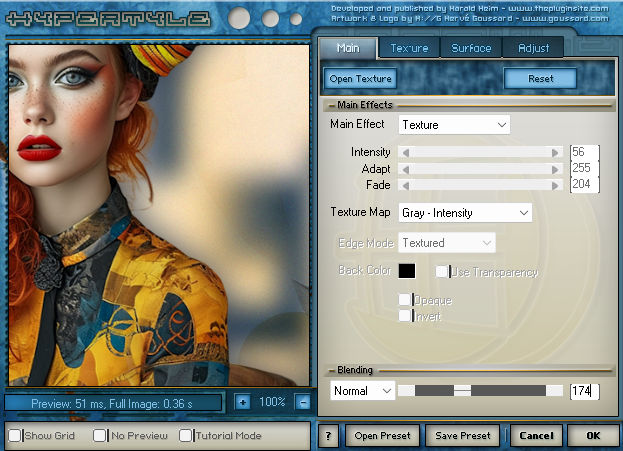
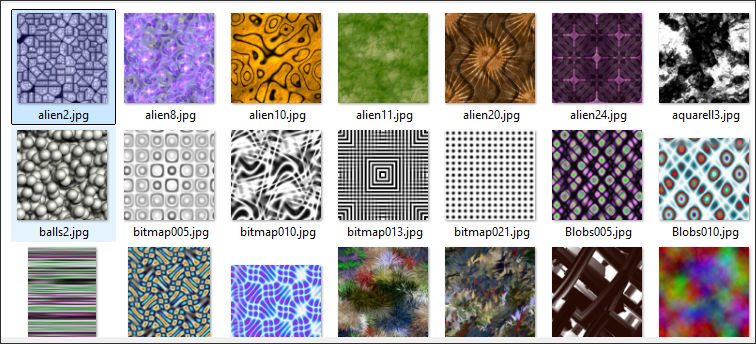
36. Effects / Plugins / The Plugin Site / Hypertyle... clique em OPEN TEXTURE primeiro:
Isso abrirá a janela abaixo...
selecione «alien2»...e OK como acima... para produzir o resultado texturizado
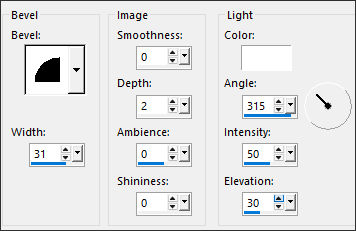
37. Effects / 3D Effects / Inner Bevel... 2 vezes.
38. Adjust / Hue and Saturation / Colorize:
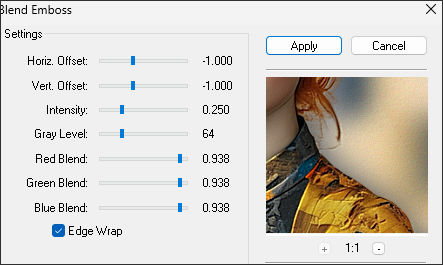
39. Effects / Plugins / FM Tile Tools / Blend Emboss...default.
Selections / Select None.
40. Escreva seu nome com uma fonte de sua escolha.
41. Image / Add Borders / Symmetric Marcado / 35 pix cor #faecd32 pix cor #334456
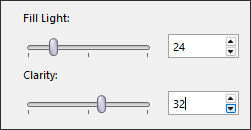
42. Adjust / Brightness and Contrast / Fill Light/Clarity:
Salve como JPG.
***

©Tutorial Traduzido por Estela Fonseca 08/02/2026.
Obrigada Elizabeth por me permitir traduzir seu trabalho.