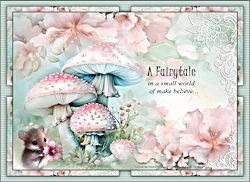
SMALL WORD
Tutorial de ©Elizabeth Creations
Este tutorial foi traduzido usando o Corel'Paint ShopPro' 2022 ULTIMATE.
Material Necessário:
Plugins Usados:
Filters Unlimited / VM Experimental e VM Toolbox...
Adjust / Variations...
Lembre-se de salvar seu trabalho com frequência.
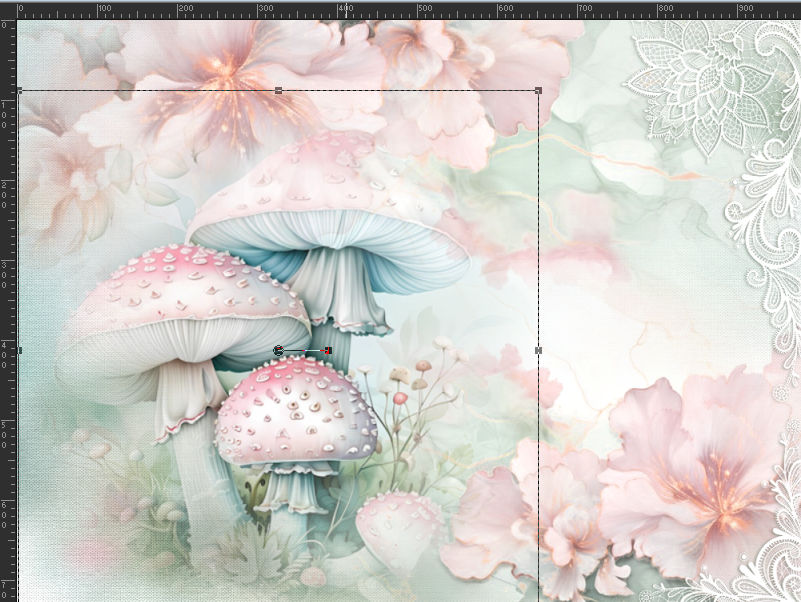
1. Na paleta de materiais...Primeiro plano cor #fffefe.2. Abra o tube « toadstool_2_layers»
com a layer «Raster 1» ativada ... Copie.
3. Abra uma nova imagem transparente de 980 X 730 pixels.
Selections / Select All.
4. Cole na seleção...
Selections / Select None.
(Minimize o tube original e reserve para uso posterior.)
5. Adjust / Blur / Gaussian Blur / Radius 15.
6. Effects / Plugins / Filters Unlimited 2.0 / Paper Textures / Canvas, Fine....Default.
7. Layers / New Raster Layer...Preencha com a cor do Primeiro Plano.
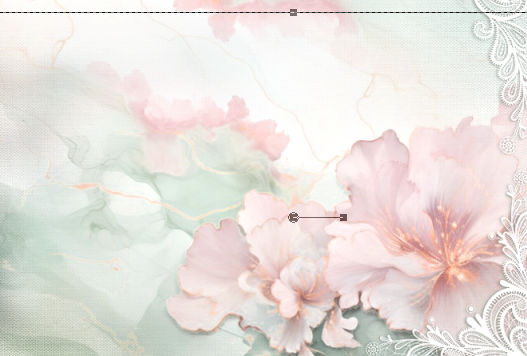
8. Abra o tube « lace_trim.png »
Com o seu trabalho em andamento ativado
Layers / New Mask Layer / From Image: lace_trim.png
9. Layers / Merge / Merge Group.
10. Effects / 3D Effects / Drop Shadow: 1 / -2 / 60 / 5 / Cor #3A4537
11. Adjust / Sharpness / Sharpen.
12. Adjust / Brightness and Contrast / Brightness/Contrast:53 / 16
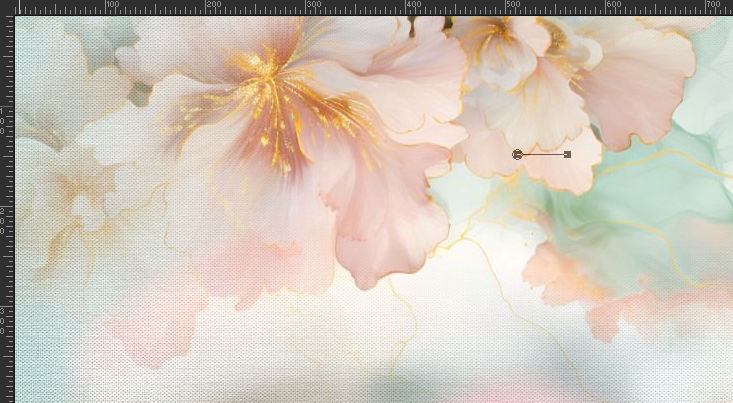
13. Ative a Layer do Fundo...Abra o tube « top_flowers.png» ...Copie e cole como nova layer.
Use a Pick Tool para posicionar na borda superior:
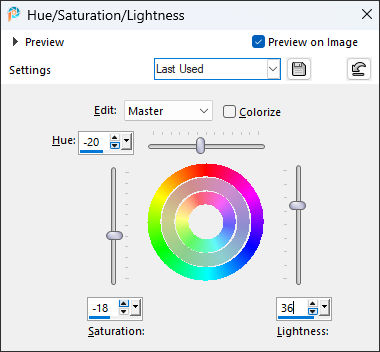
14. Adjust / Hue and Saturation / Hue/Saturation/Lightness:
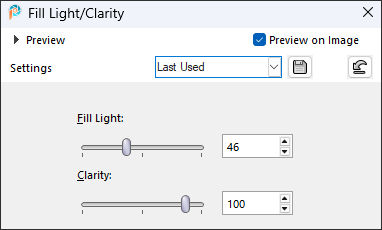
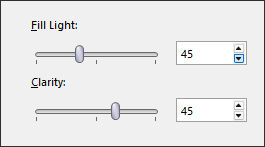
15. Adjust / Brightness and Contrast / Fill Light/Clarity:
16. Layers / Duplicate.
Merge / Merge Down.
17. Layers / Duplicate.
18. Image / Mirror / Mirror Horizontal...
Image / Mirror / Mirror Vertical.
19. Image / Resize 80% ... Resize all Layers ...Desmarcado.
Use a Pick Tool para selecionar da seguinte maneira:
20. Ative a layer do topo...Volte ao tube «toadstool_2_layers» reservado na etapa 4...Ative a layer misted
Cole como nova layer em seu trabalho
Posicione na borda inferior:
21. Layers / Duplicate.
Layers / Merge / Merge Down.
22. Adjust / Hue and Saturation / Vibrancy 25.
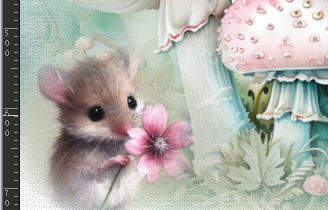
23. Abra o tube «mouse.png.» Copie e cole como nova layer em seu trabalho.
Coloque no canto inferior esquerdo.
24.Abra o « text.png.» Copie e cole como nova layer
Posicione no lado direito ... ver modelo.
25. Escreva seu nome com uma fonte de sua escolha.
26.Se você está satisfeito com o posicionamento de seu trabalho....então
Layers / Merge / Merge Visible.
27. Effects / Plugins / Adjust / Variations....clique em ORIGINAL uma vez e em DARKER uma vez.
28. Adjust / Brightness and Contrast / Fill Light/Clarity... 45.
29. Image / Add Borders / Symmetric Marcado / 4 pixels cor #60735b
Image / Add Borders / Symmetric Marcado / 50 pixels cor #d1e3de.
30. Use a Magic Wand Tool com Feather and Tolerance em 0 para selecionar a borda externa.
31. Effects / Plugins / Filters Unlimited 2.0/ VM Toolbox / Instant Tile...Default.
32. Selections / Select None.
33. Use a Magic Wand Tool com Feather and Tolerance em 0 para selecionar a parte restante da bordaexterna.
34. Effects / Plugins / Filters Unlimited 2.0 / VM Experimental / TeeWee...Default.
35. Selections / Invert.
36. Effects / 3D Effects / Drop Shadow: 0 / 0 / 85 / 25 / Cor ##3a4537
37. Selections / Select None.
38. Image / Add Borders / Symmetric Marcado / 2 pixels cor #60735bSalve como JPG.

©Tutorial Traduzido por Estela Fonseca 25/05/2025.
Obrigada Elizabeth por me permitir traduzir seu trabalho.