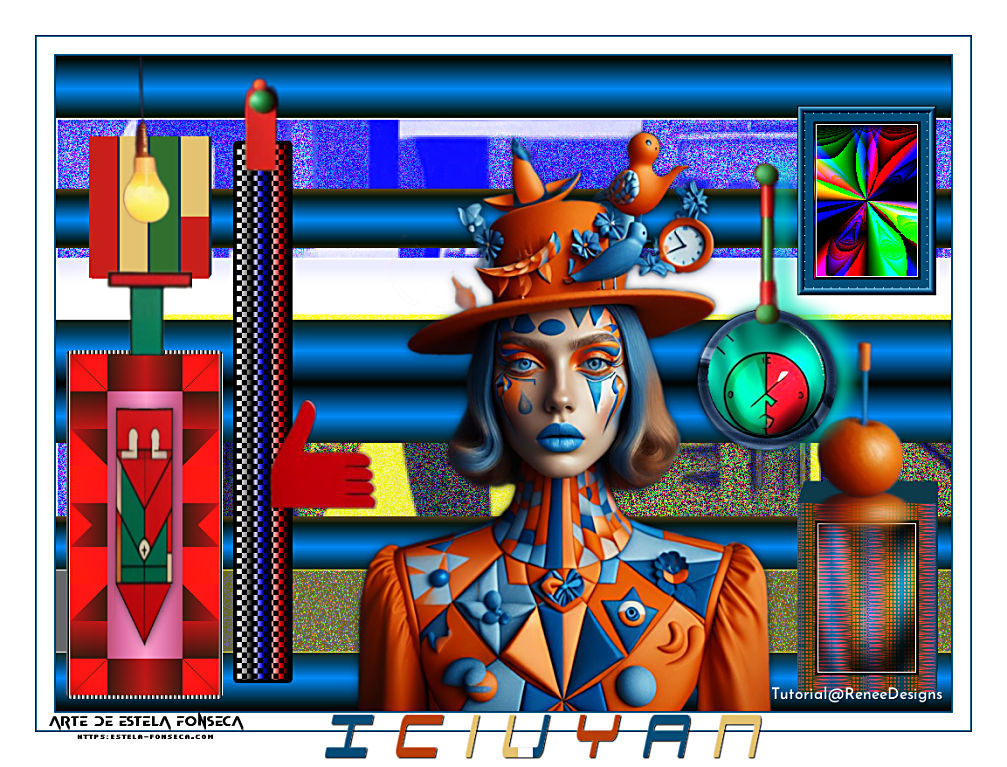
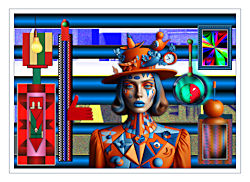
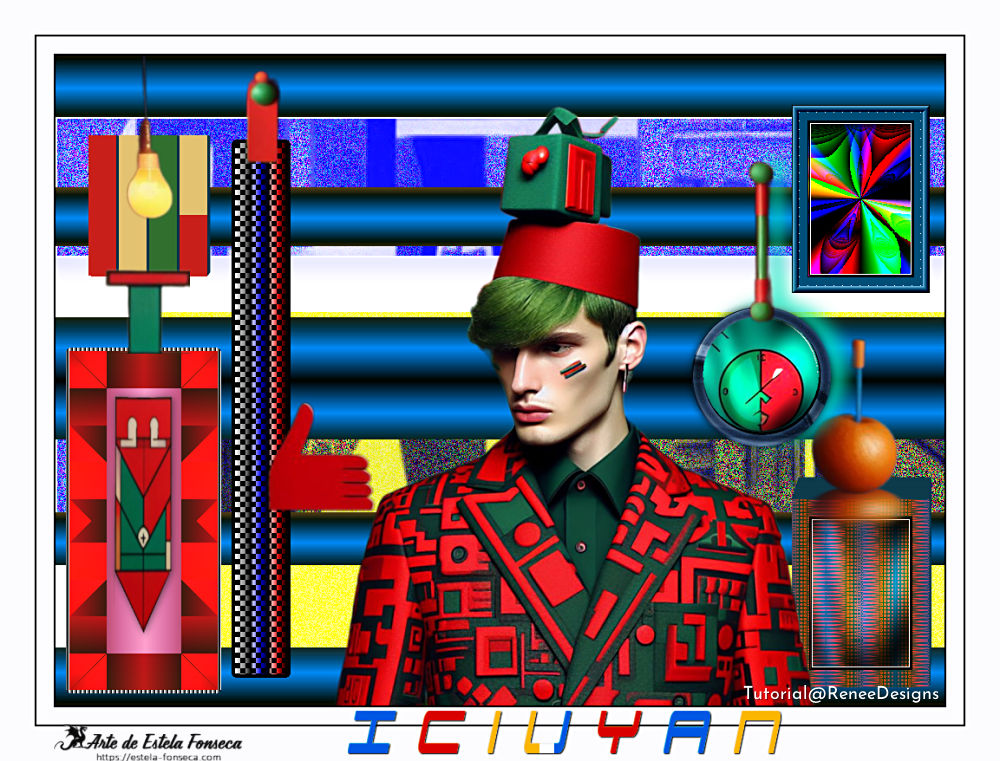
iciuyan
Tutorial de Renée Graphic , original, Aqui.
O tutorial foi traduzido na versão Corel PaintShopPro 2022 ULTIMATE, mas pode ser feito com outras versões.
Materiais Necessários:
Tubes de Renée...
ATENÇÃO:
Aviso de Renée*
Se for sua intenção compartilhar esses tubes ou essas lições em grupo, peça permissão ao proprietário.
O tube não pode ser enviado sem a aula. Por favor, não faça alterações no tube, pois este tube foi feito apenas paraesta lição.
É proibido compartilhar este tutorial sem link para a lição original.
Muito obrigado.Renée.
Eles estão a disposição em seu site=> AQUI.
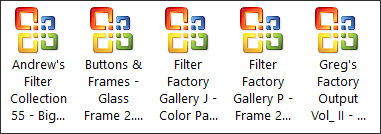
PLUGINS
Atenção
Lembrete Se você usar o Filter Unlimited 2.3, de Renée, ele consiste em 3 pastas
Dê uma olhada nas pastas antes de adicionar uma predefinição.Para este tutorial...
1. Abra uma nova imagem transparente de 1025 x 750 pixels.
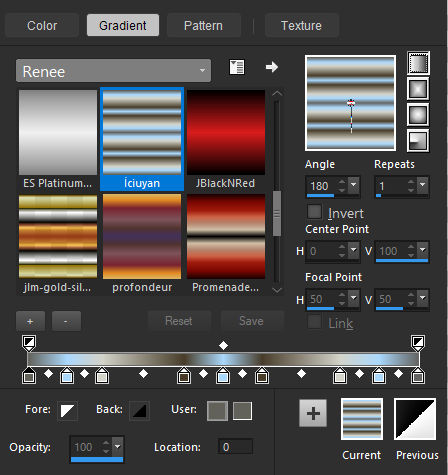
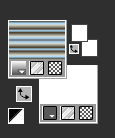
Em Estilos e Texturas: No Primeiro Plano, aplique o gradiente "İciuyan" e no Plano de Fundo a cor Branca.Configure como segue:
2. Preencha a layer com o Gradiente
3. Effects / Plugins / VM Toolbox / Remove gray / Default
4. Selections / Load /Save Selection / Load selection from Disk: "İciuyan-1"Delete no Teclado
5. Layers / New Raster Layer
6. Ative a imagem: "Renee-Iciuyan-Image1" copie e cole na seleção
7. Layers / New Raster Layer
8. Preencha com a cor branca
9. Selections / Modify / Contract / 1 pixelDelete no Teclado
Selections / Select None
10. Effects / 3D Effects / Drop Shadow: 3 / -2 / 100 / 15,00 / Cor #000000
11. Layers / Merge / Merge Down
Em Estilos e Texturas: Plano de Fundo cor N° 2
12. Selections / Load /Save Selection / Load selection from Disk: "İciuyan-1"
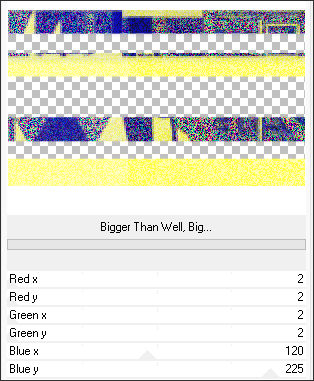
13. Effects / Plugins / Filters Unlimited 2.0 / Andrew's Filter Collection 55 / Bigger Than Well, Big...
Selections / Select None
Estilos e Texturas: Primeiro Plano cor N°1 e Plano de Fundo cor Nº214. Layers / New Raster Layer
15. Selections / Load /Save Selection / Load selection from Disk: "İciuyan-2"
16. Preencha com a cor N° 1
17. Effects / Plugins / Filters Unlimited 2.0 / ICNET-Filters / Buttons & Frames / 3D Glass Frame 2 => 26/128
18. Selections / Modify / Contract / 8 Pixels
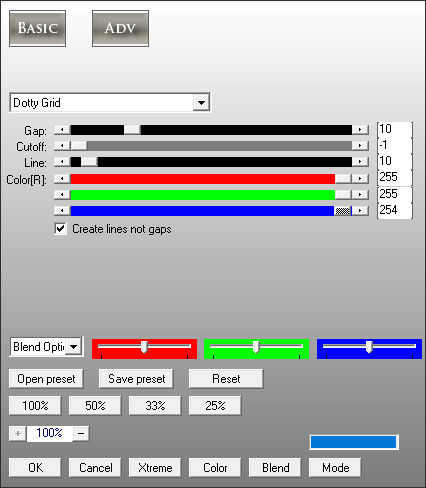
19. Effects / Plugins / AP[Lines] /Lines Silverlining: Dotty Grid
20. Selections/ Modify / Contract / 10 Pixels
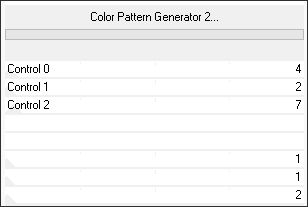
21. Effects / Plugins / Filters Unlimited 2.0 / Filter Factory Gallery J / Color Pattern Generator 2...
22. Effects / Plugins / AAA Frame / Foto Frame
Selections / Select None
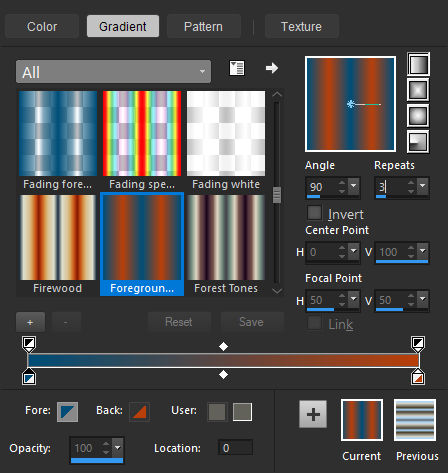
Forme no Primeiro Plano um Gradiente Linear e configure assim:
23. Layers / New raster layer
24. Selections / Load /Save Selection / Load selection from Disk: "İciuyan-3"
25. Preencha com o gradiente
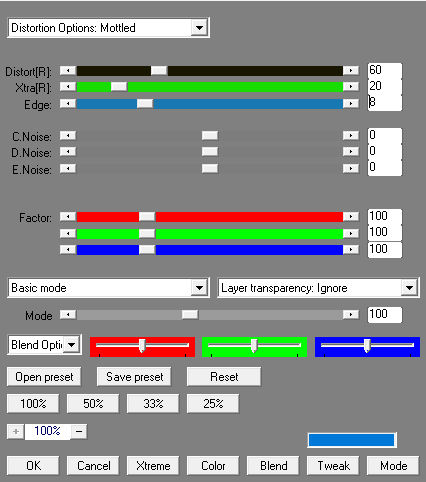
26. Effects / Plugins / AP[Distort] / Distort GridEdge
27. Effects / Edge Effects / Enhance
28. Effects / Plugins / Simple / Zoom out and flip
29. Selections / Modify / Contract / 20 Pixels
30. Effects / Plugins / Filters Unlimited 2.0 / Greg's Factory Output Vol. II / Pool Shadow / Default
31. Effects / Plugins / AAA Frame / Foto Frame (na memória)Selections / Select None
32. Effects / Plugins / Alien Skin EyeCandy 5 / Impact / Extrude
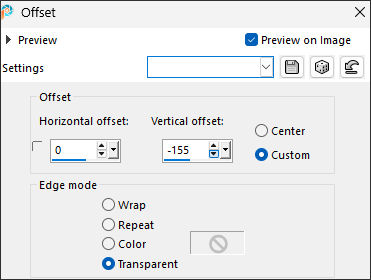
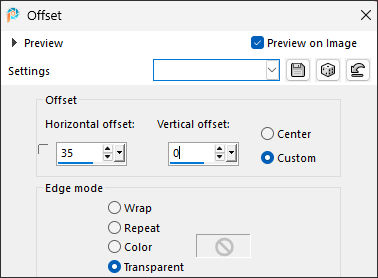
33. Effects / Image Effects / Offset
34. Ative a imagem: 'İciuyan-pomme'Copie e cole como nova layer
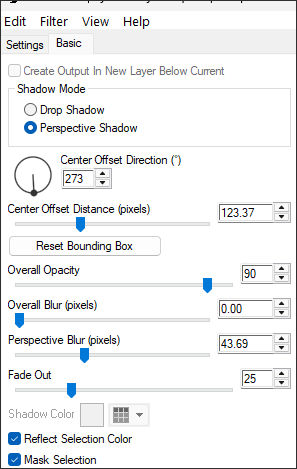
Posicione como na imagem final35. Effects / Plugins / Alien Skin EyeCandy 5 / Impact / Perspective shadow-Preset: 'İciuyan-Shadow'
ou
36. Ative a imagem: 'İciuyan Circle'
Copie e cole como nova layer
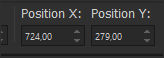
37. Pick (K) Position X (724,00) Position Y (279,00) ... Use a tecla "M" para desmarcar a seleção
38. Ative a imagem "Iciuyan-tige"
Copie e cole como nova layer
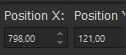
39. Pick (K) Position X (798,00) Position Y (121,00) ... Use a tecla "M" para desmarcar a seleção
40. Layers / Merge / Merge Down
41. Effects / 3D Effects / Drop Shadow: - 5 / 17 / 75 / 25,00 / Cor #00e7bc
42. Layers / New Raster Layer
43. Selections / Load /Save Selection / Load selection from Disk: "İciuyan-4"
44. Preencha com a cor N°4Selections / Select None
45. Effects / Plugins / Alien Skin EyeCandy 5 / Impact / Extrude
46. Layers / Duplicate
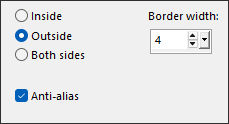
47. Effects / Image Effects / Offset
48. Layers / Duplicate
49. Effects / Image Effects / Offset... Na MemóriaRepira mais uma vez as etapas 48 e 49
50. Ative a Ferramenta de Colorir ... Change Color Tool e pinte as barras total ou parcialmente como preferir
Ative a Layer do Topo
51. Layers / Merge / Merge Down (3 vezes)
52. Ative a imagem "Iciuyan-lamp" ... Copie e cole como nova layerPosicione
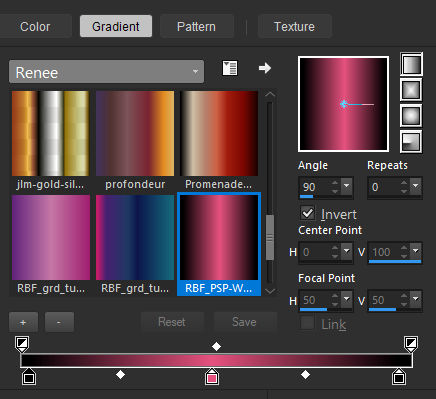
Estilos e Texturas / Coloque no primeiro Plano o gradiente "RBF_PSP-Works_grd_3_001"
Configure como segue:
53. Layers / New raster layer
54. Selections / Load /Save Selection / Load selection from Disk: "İciuyan-5"
55. Pinte com o Gradiente
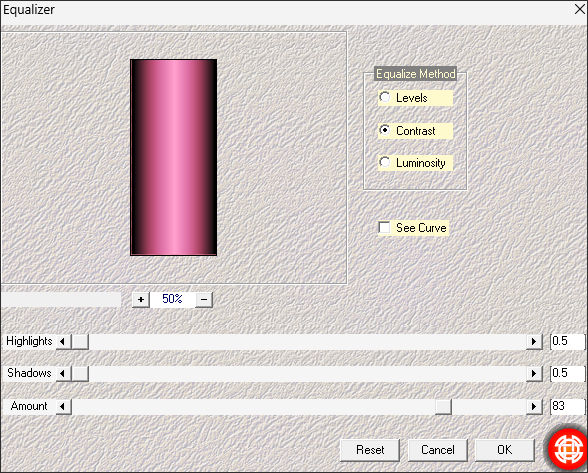
56. Effects / Plugins / Medhi / Equalizer
57. Effects /Plugins / Filters Unlimited 2.0 / Filter Factory Gallery P / Frame 21 Seamless... Default
PERMANEÇA NESTA CAMADA58. Layer / New Raster Layer
59. Selections / Modify / Select Selection Borders:
60. Pinte com a cor preta
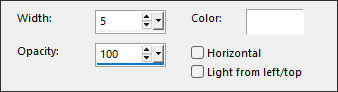
61. Effects / Texture Effects / Blinds...cor branca
Selections / Select None62. Layers / Merge / Merge Down
63. Ative a imagem: "Iciuyan-manette"Copie e cole como nova layer
(Você tem uma pequena linha horizontal fina sob o tube para posicioná-lo corretamente na borda;veja o resultado final.)
64. Layers / Merge / Merge Down
65. Ative: "Iciuyan-Arrow-Deco"Copie e cole como nova layer
Posicione como na imagem final66. Effects / 3D Effects / Drop Shadow: 1 / 1 / 62 / 13 Cor #000000
67. Layers / New Raster Layer
68. Selections / Load /Save Selection / Load selection from Disk: "İciuyan-6"
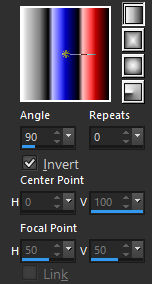
69. Pinte com o Gradiente "cg-red-white-blue" Linear configurado como segue:
70. Effects / Plugins / L & K's / Pia => 6
71. Selections / Modify / Select Selection Borders / Outside / 4 Pixels
72. Pinte a seleção com a cor PretaSelections / Select None
73. Abra as imagens: "Iciuyan-attache" e "Iciuyan-main" Copie e cole como nova layer
Posicione como no modelo.
74. Ative: "Renee-TUBES-Iciuyan-tubes-in-plus-of-the-tutorial"
Escolha a sua personagem ... copie e cole como nova layerImage / Resize / 68% ... Resize All Layers ... Desmarcado ... Posicione no centro da tag.
75. Drop Shadow (opcional)
76. Image / Add Borders / Symmetric Marcado / 2 Pixel cor #120 Pixel cor branco
2 Pixel cor #1
40 Pixel cor branca
77. Coloque a marca d'água de Renée.
78. Layers / Merge / Merge all (Flatteen)
80. Image / Resize / 1005 Pixels de largura ... Resize All Layers ... Marcado
Versão Extra: Tubes de Renée:
©Tutorial traduzido por Estela Fonseca em 19/02/2026.
Não alterar nem repassar sem autorização.